Audi A4 B7: Shock Absorber Review and How to Install
Read on to see how to install a lower, firmer, adjustable coilover suspension in your own garage, using common tools.
This article applies to the Audi A4 B7 (2005-2008).
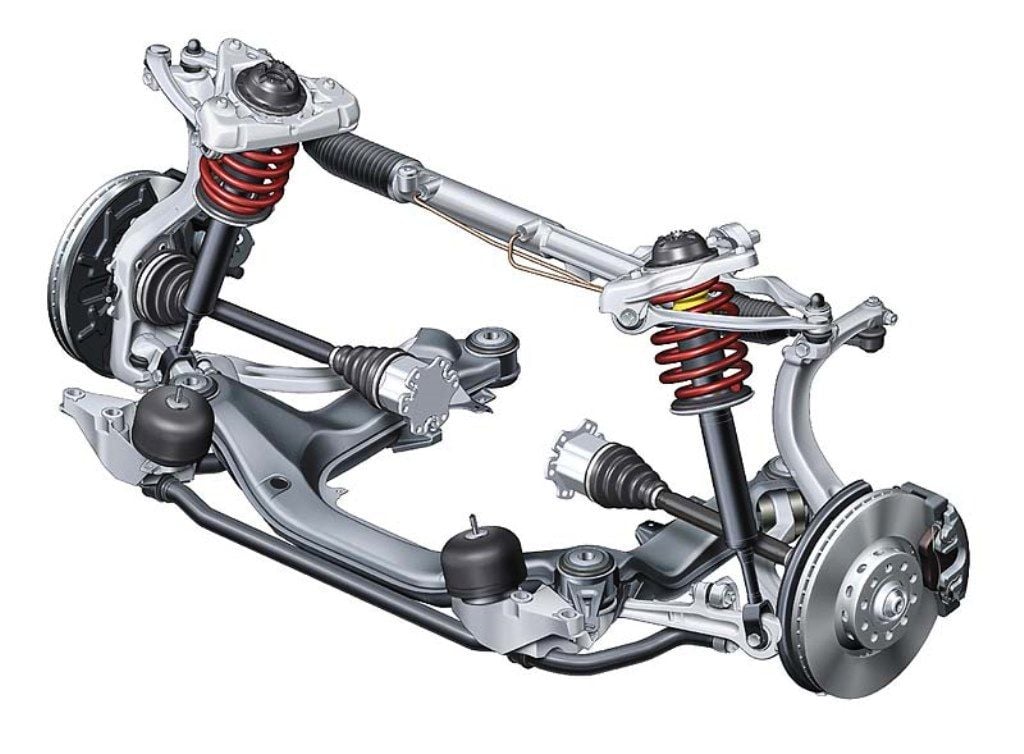
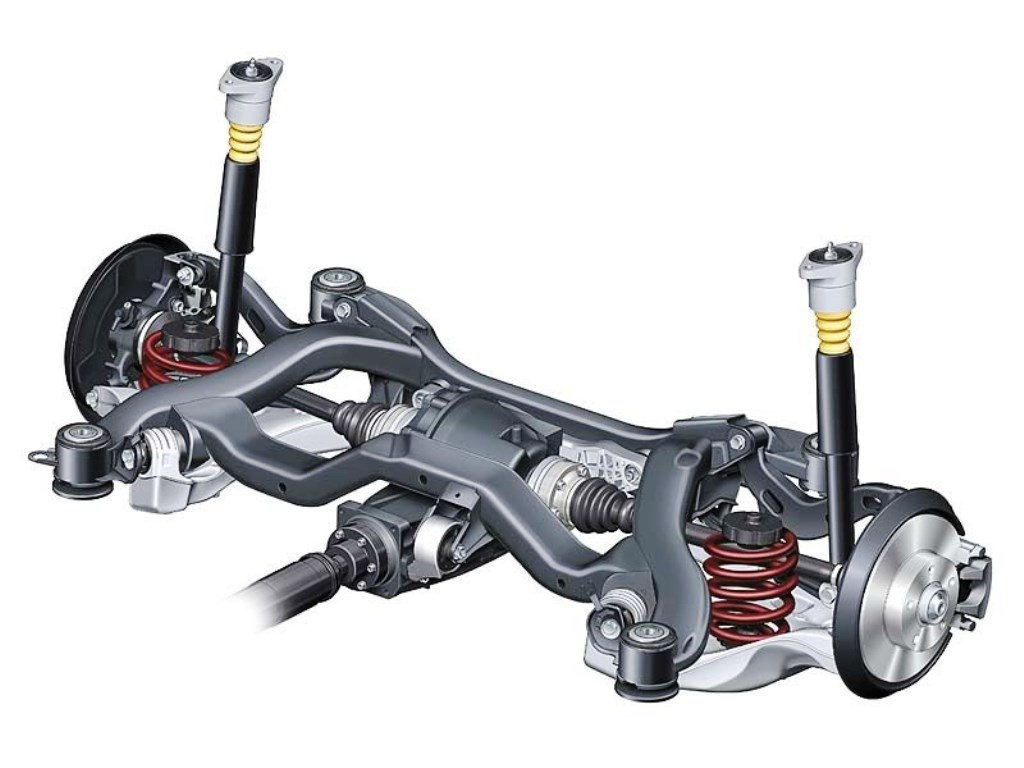
Many people feel that for the ultimate handling in their A4, they need to convert the non adjustable coilover shocks, and rear dampers, to ones with adjustable springs pre-load/ride height and damping. Sure, an Audi can be made to handle with stock type dampers, but the adjustibility and durability is much better in race type coilovers. Plus, you have the added benefit of being able to set the ride height at one setting for street use, then drop it lower for track or autocross use.
Installing coilovers is fairly straightforward on the Audi A4, and actually easier than installing new springs on stock type shocks, or new shocks with the factory springs, because you don't nee a spring compressor to put the coilover spring/shock together. However, suspension components are subject to corrosion and the bolts can be very difficult to remove. It is very beneficial to soak suspension bolts in PB Blaster overnight and then apply heat from an electric heat gun, just before loosening.
Table of Contents
How to Install the A4 Suspension Kit

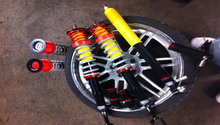
Materials Needed
- Suspension kit
- Metric socket set with extension
- Dead blow mallet
- Flat-tip screwdriver
- Torx driver set
- Pry bar
- Floor jack
- Jack stands
- PB Blaster
- 1500 watt heat gun
- Spring compressor
Install Front Coilovers
Step 1 – Jack car and place on jack stands
Jack up your A4 on a level concrete surface. For detailed instructions, see: How to Jack Up Your Car.
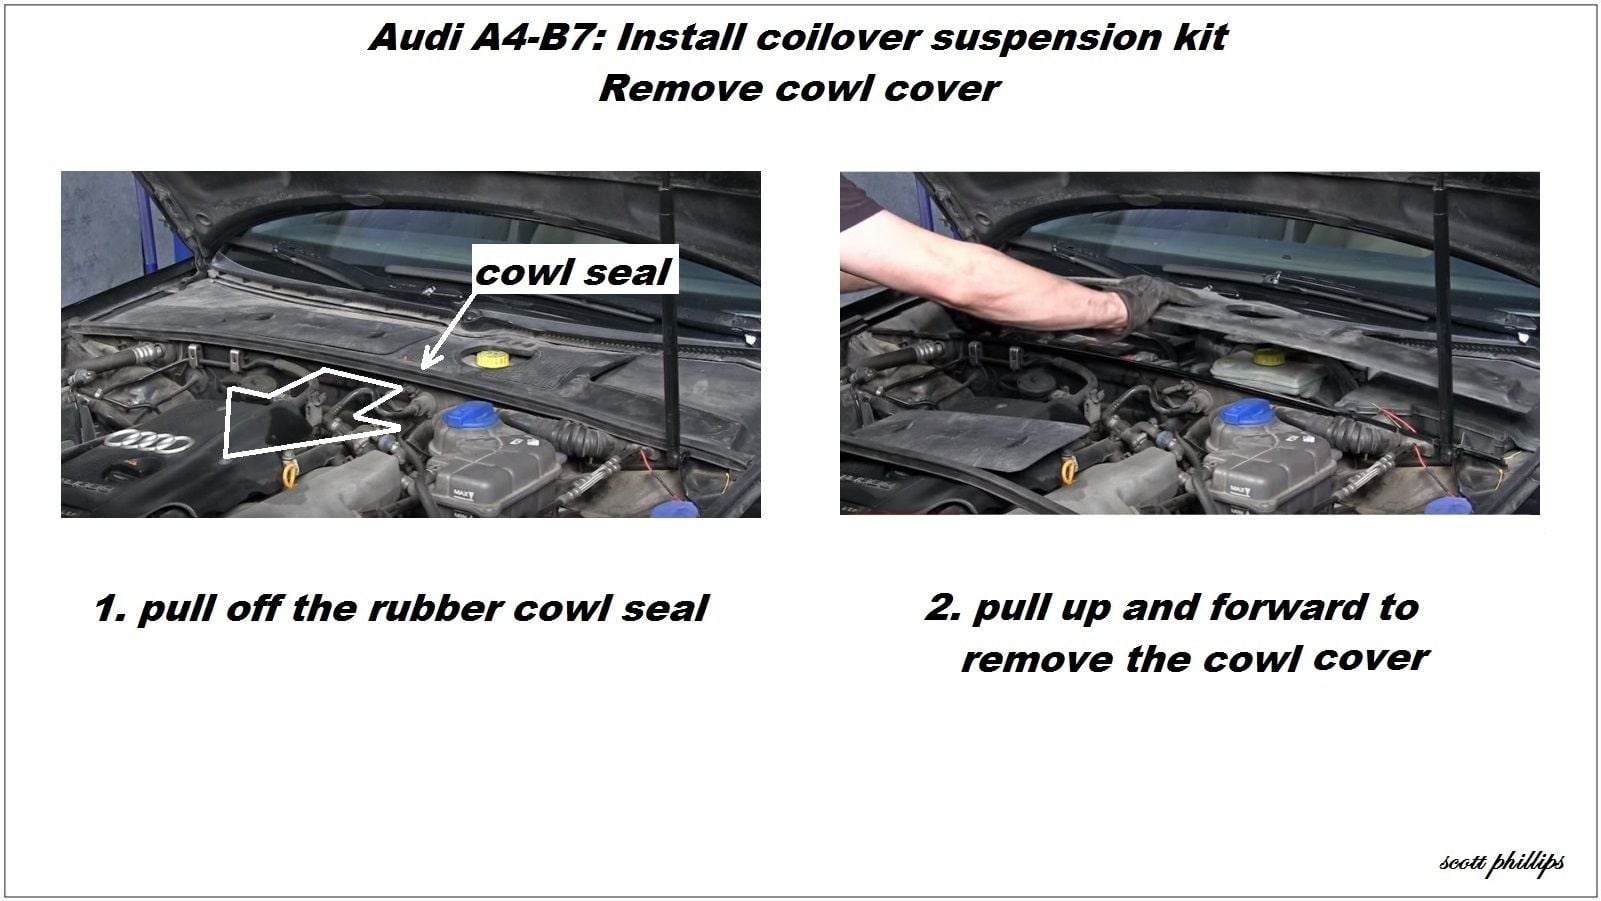
Step 2 – Remove cowl cover
- Pull the rubber cowl seal off the front of the cowl cover.
- Pull the cowl cover up and forward to remove it.
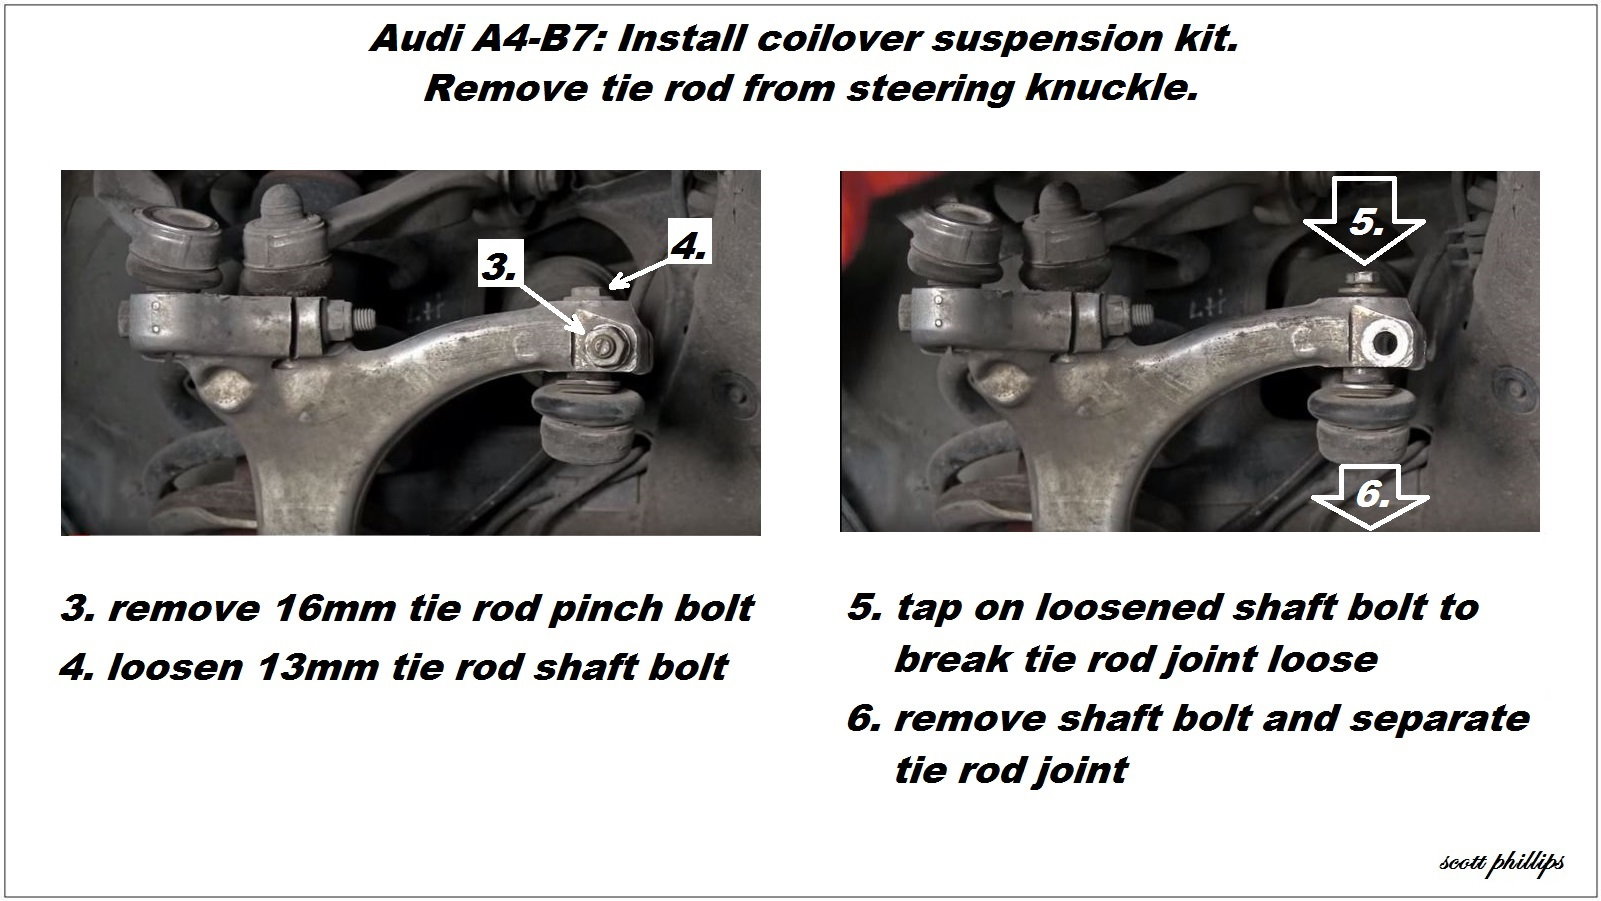
Step 3 – Disconnect tie rod end
- Use the 16mm wrench to remove the tie rod pinch bolt.
- Use the 13mm wrench to loosen the tie rod shaft bolt.
- Use the dead blow mallet to tap down on the shaft bolt head and break the tie rod joint free.
- Remove the shaft bolt and separate the tie rod from the steering knuckle.
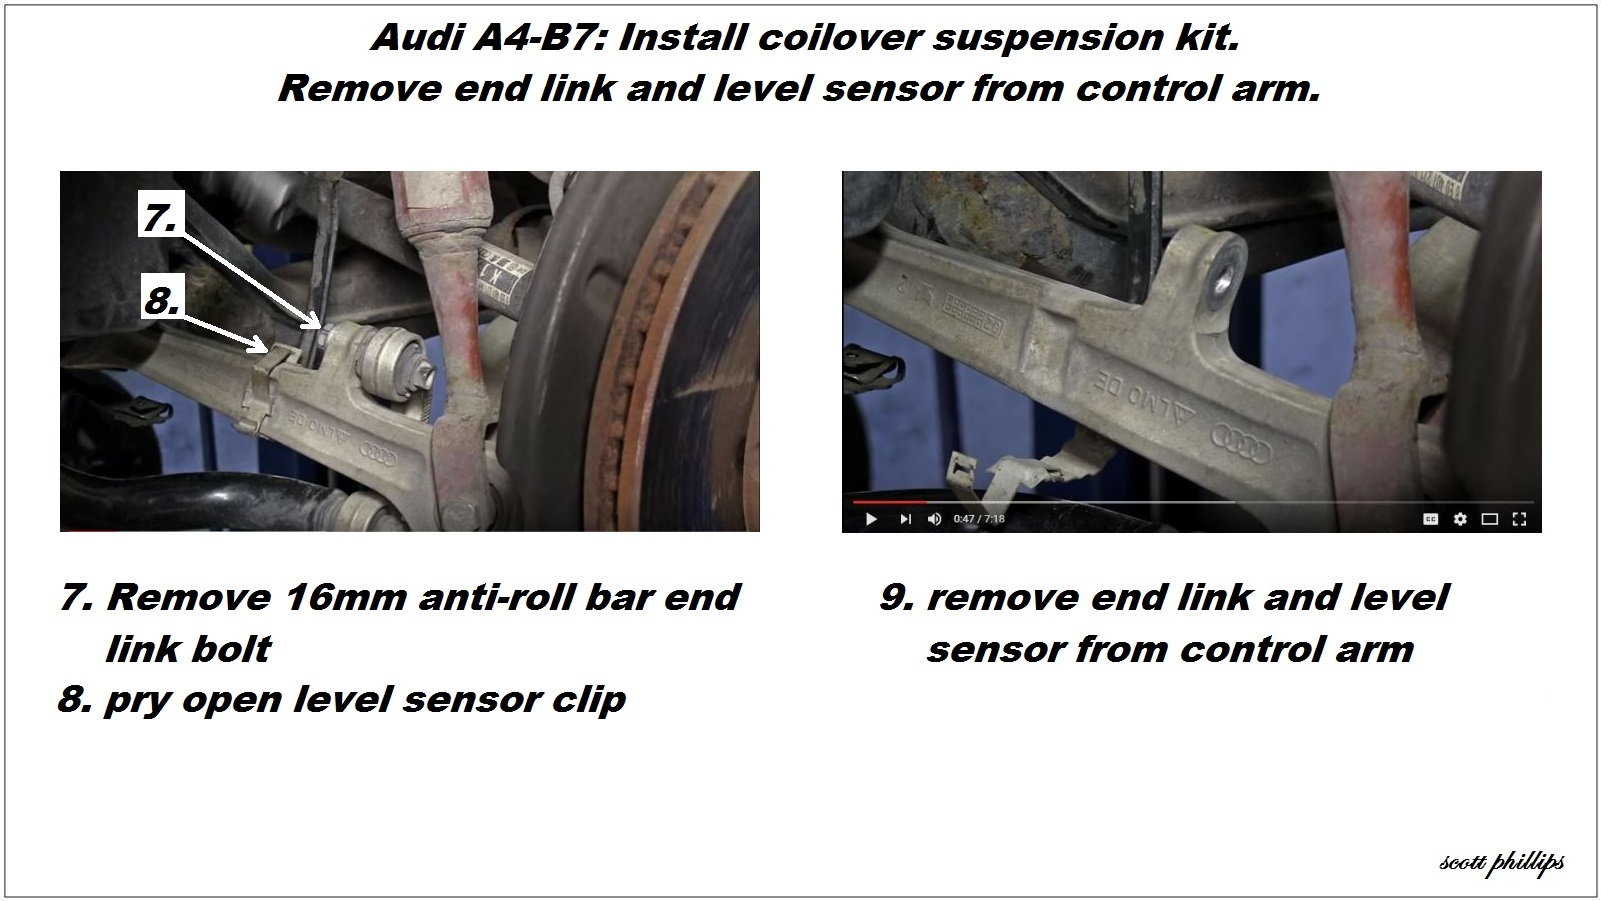
Step 4 – Disconnect sway bar end link and level sensor
- Use the 16mm wrench to remove the anti-roll bar end link.
- Use the flat-tip screwdriver to pry open the level sensor clip.
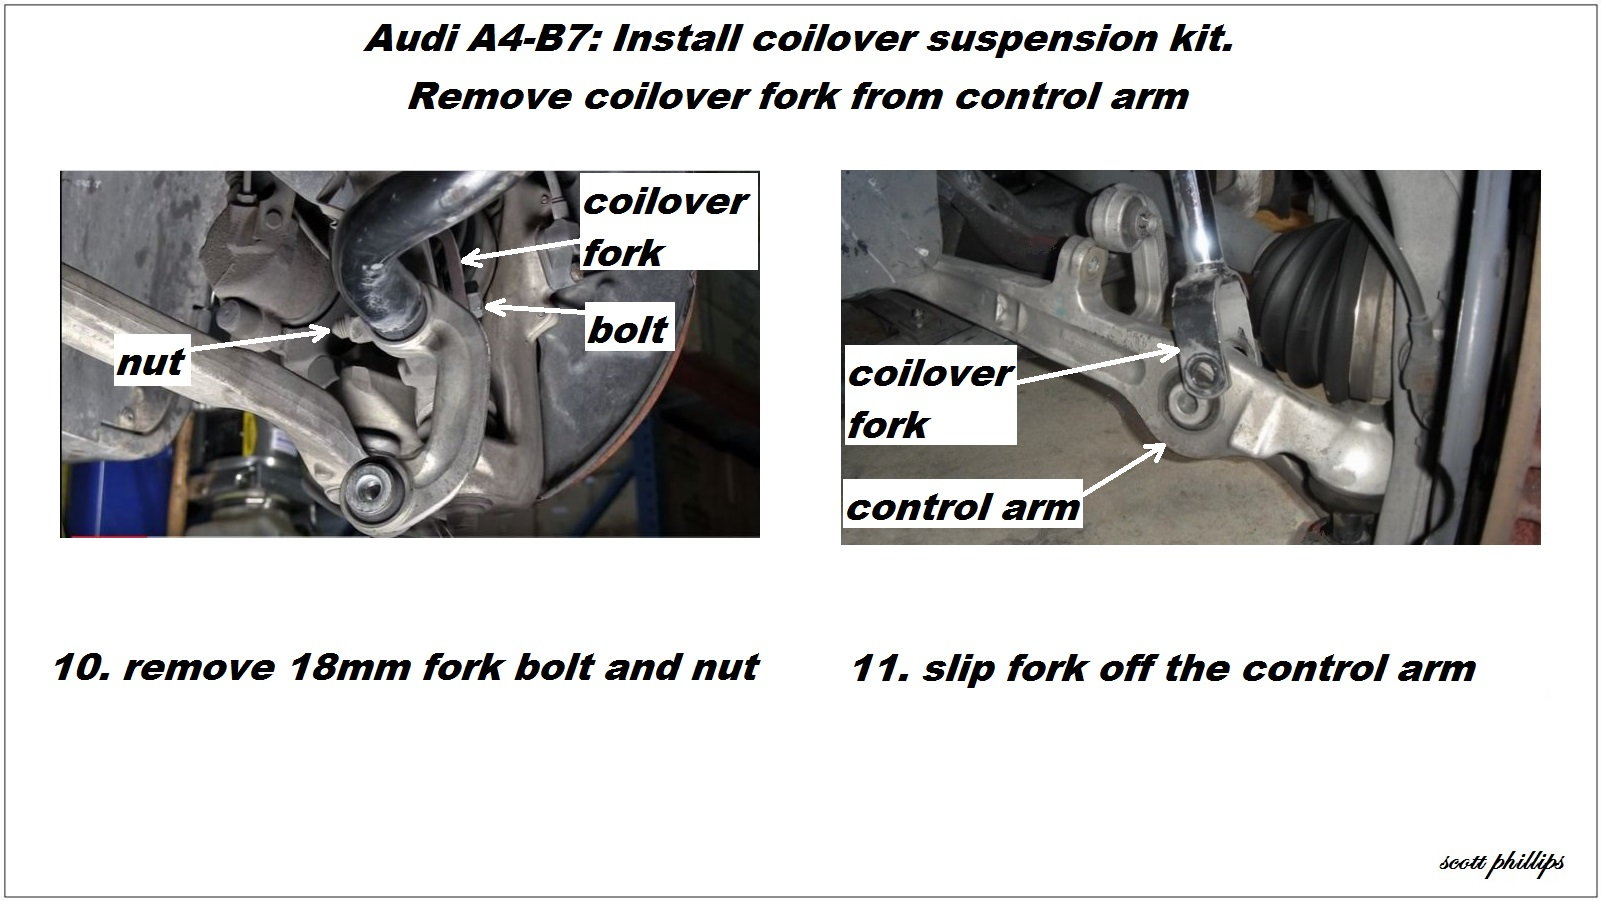
Step 5 – Unbolt coilover fork
- Use 18mm wrenches to remove the coilover fork bolt.
- Slip the fork off the control arm.
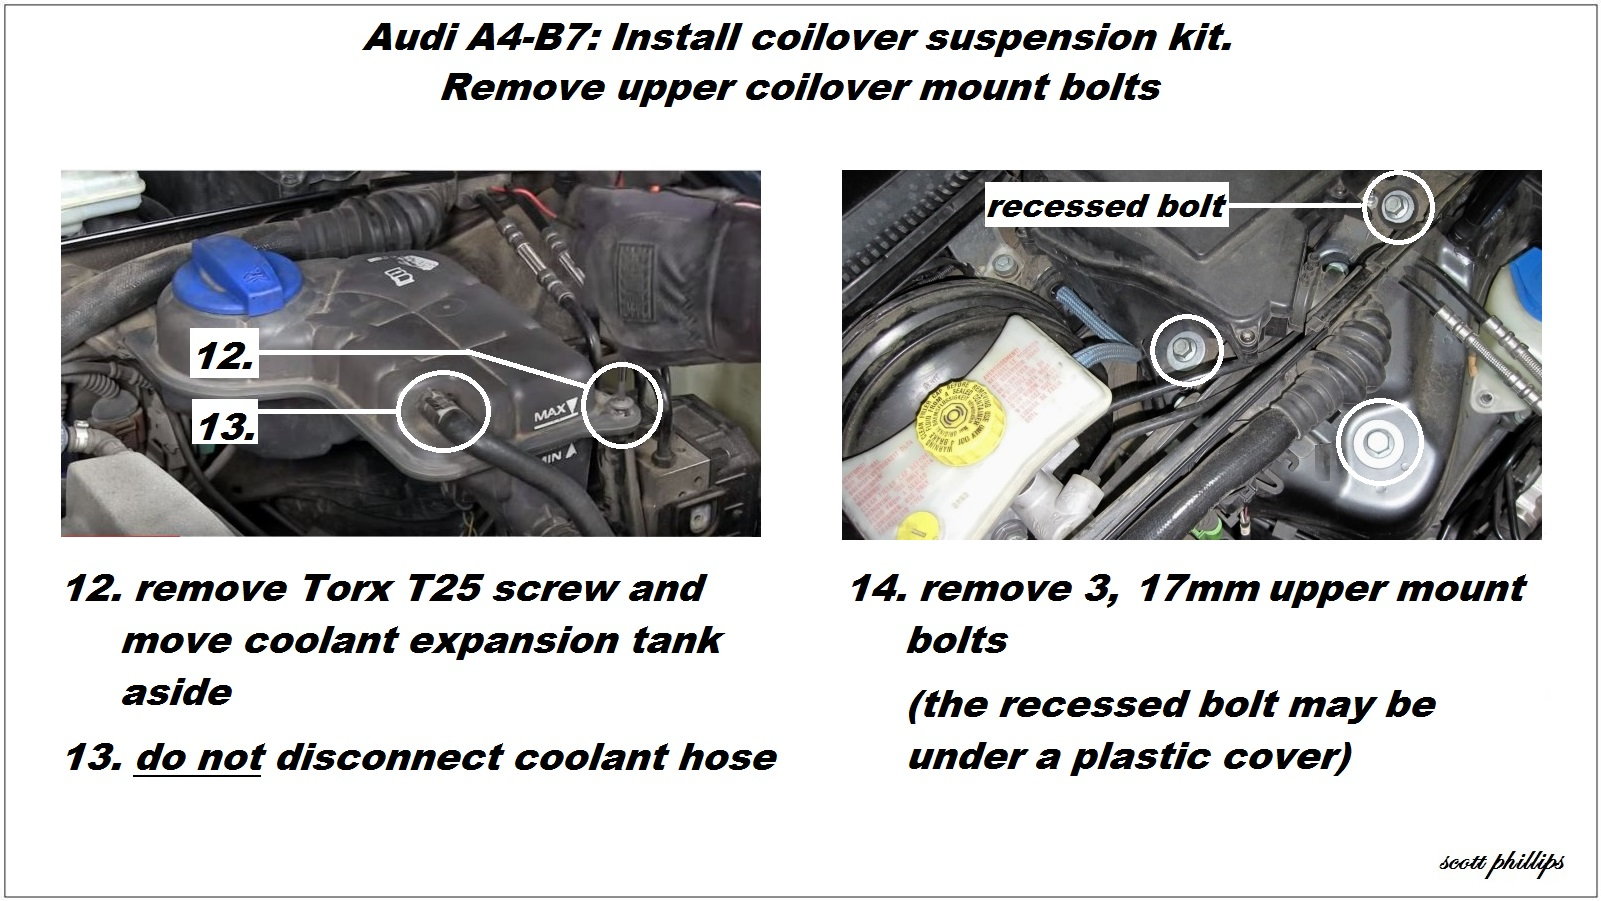
Step 6 – Remove coilover upper mount bolts
- Use the Torx T25 to remove the coolant expansion tank screw and set the tank aside. (Do not disconnect the coolant line.)
- Use the 17mm wrench with extension to remove the three upper mount bolts. (The recessed bolt may be under a plastic cover.)
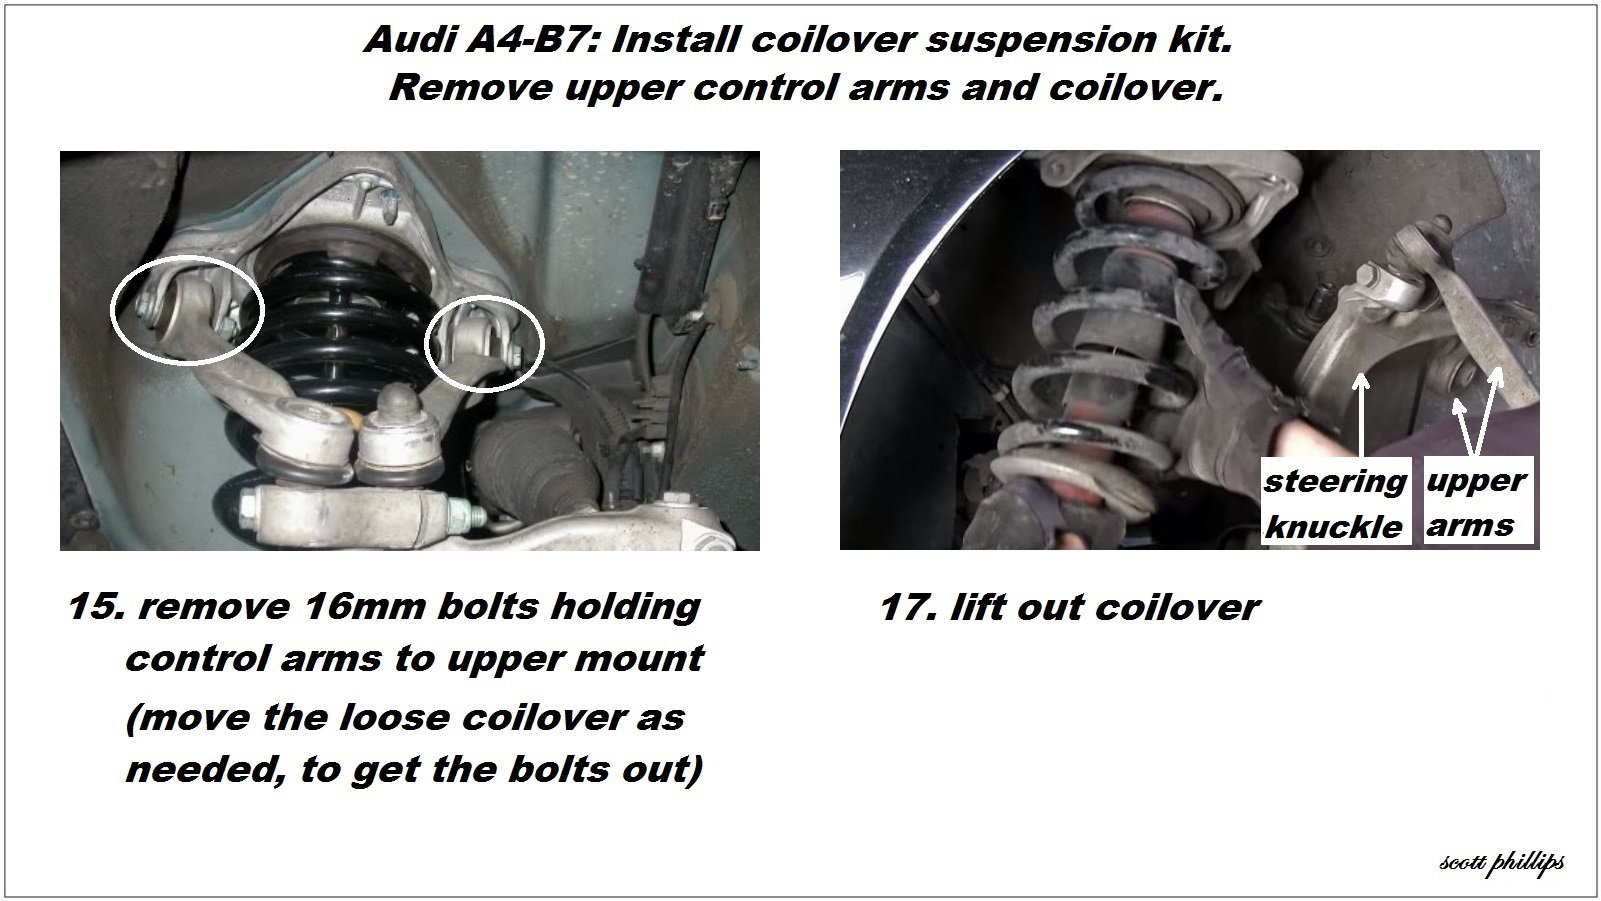
Step 7 – Unbolt upper control arms and remove shock
- Use the 16mm wrenches to remove the control arm bolts from the upper shock mount.
- Lift the stock coilover shock out.
Step 8 – Install new coilover
- Swap the upper shock mount to the new coilover as required by your kit's instructions.
- Installation is reverse of removal.
- Insert all bolts and leave loosely fastened.
- Lower the car off the jacks.
- With vehicle's weight on its wheels, properly torque all the fasteners fully.
Install Rear Dampers and Springs
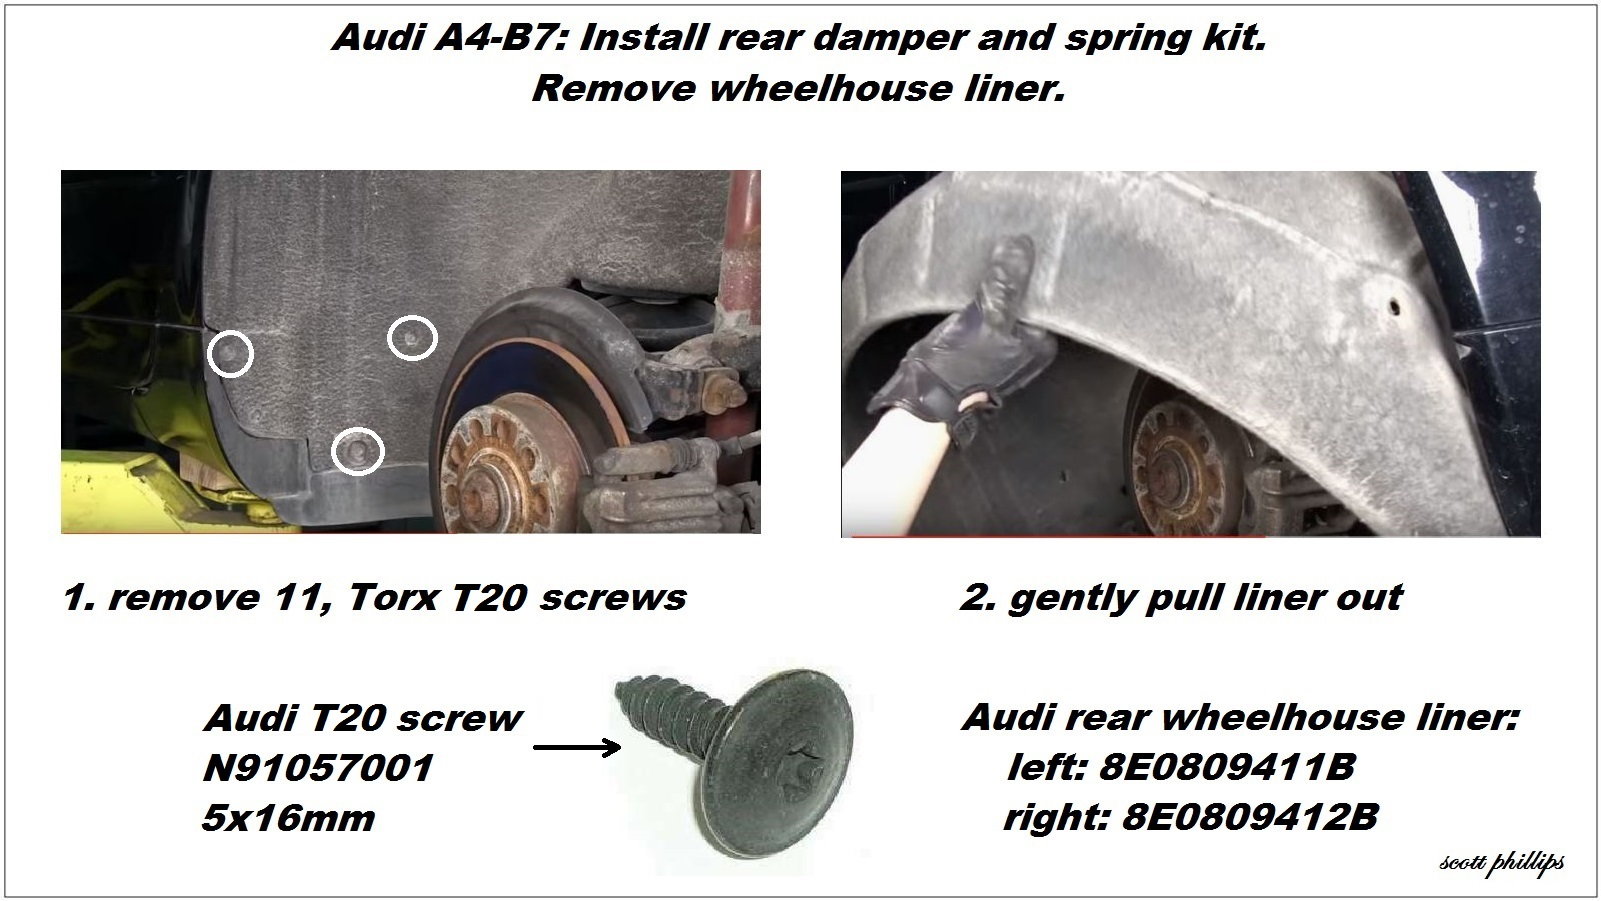
Step 1 – Remove fender liner
- Use the Torx T20 driver to remove 11 screws.
- Gently pull the liner out.
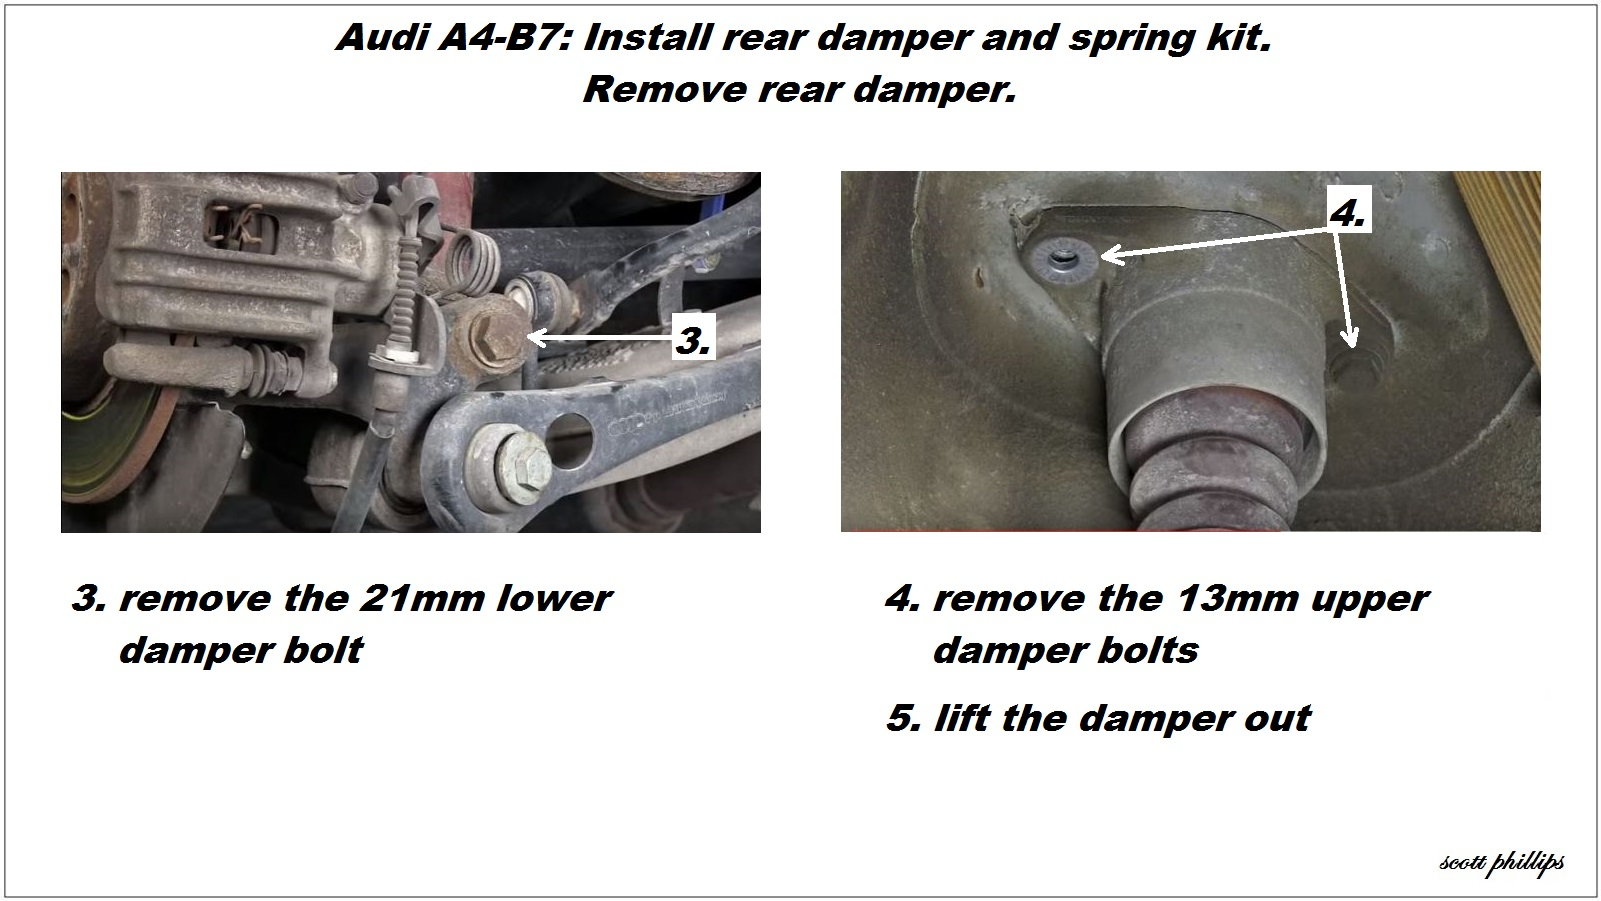
Step 2 – Remove rear damper
- Use the 21mm wrench to remove the lower damper bolt.
- Use the 13mm wrench to remove the two upper damper bolts.
- Remove the damper.
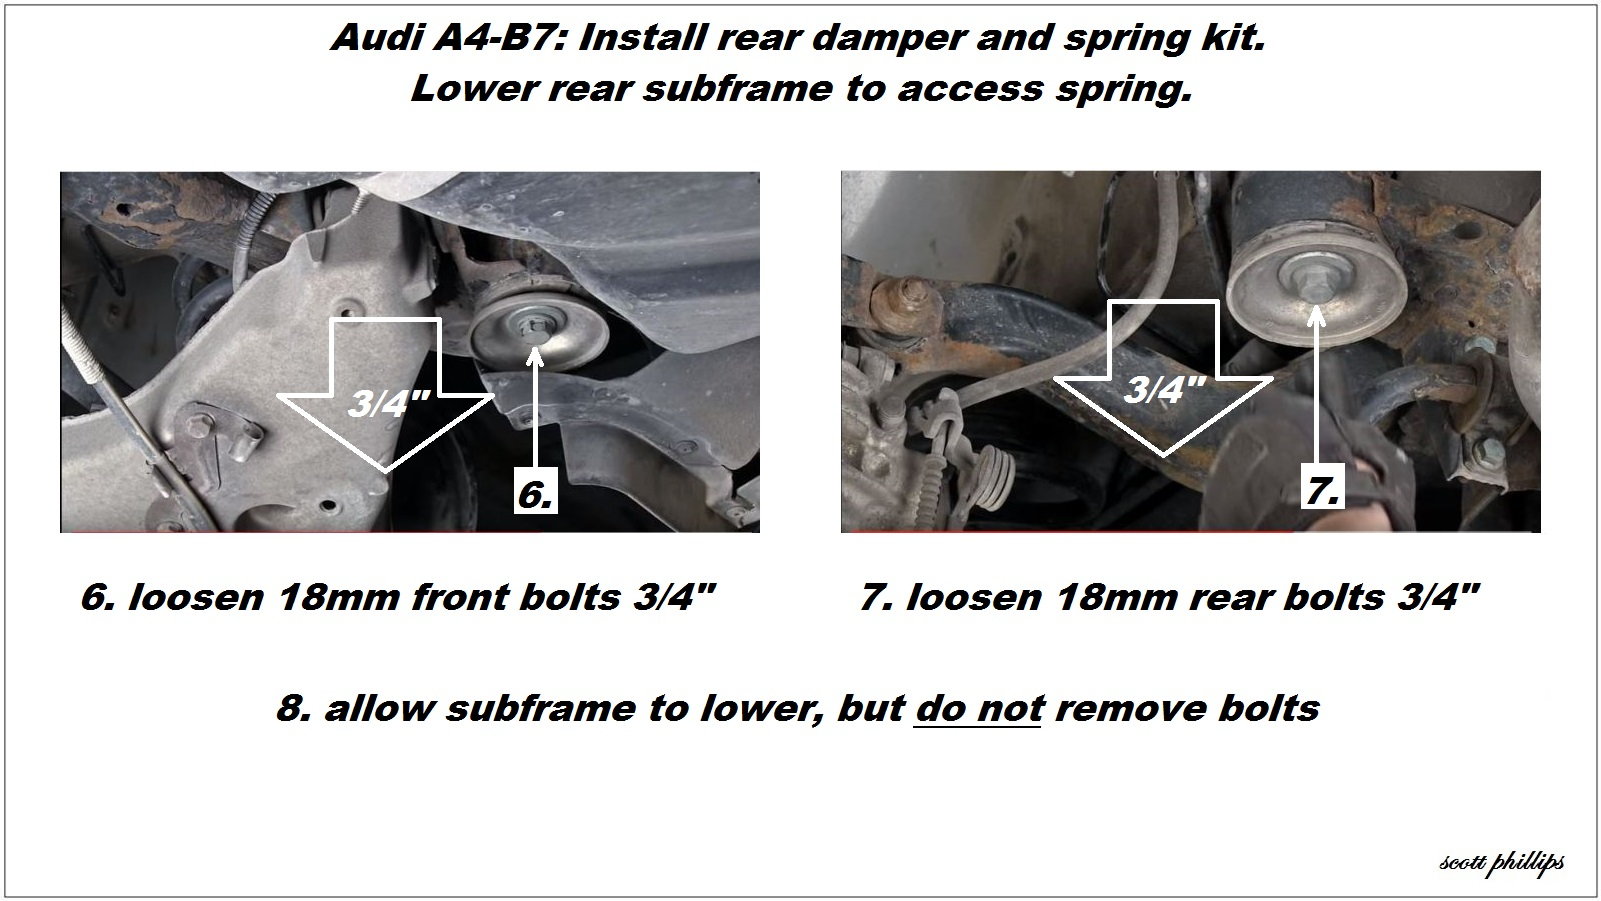
Step 3 – Lower the rear subframe 3/4"
- Use the 18mm wrench to loosen the subframe bolts, and back out 3/4".
- Allow the subframe to sag, but DO NOT remove the bolts.
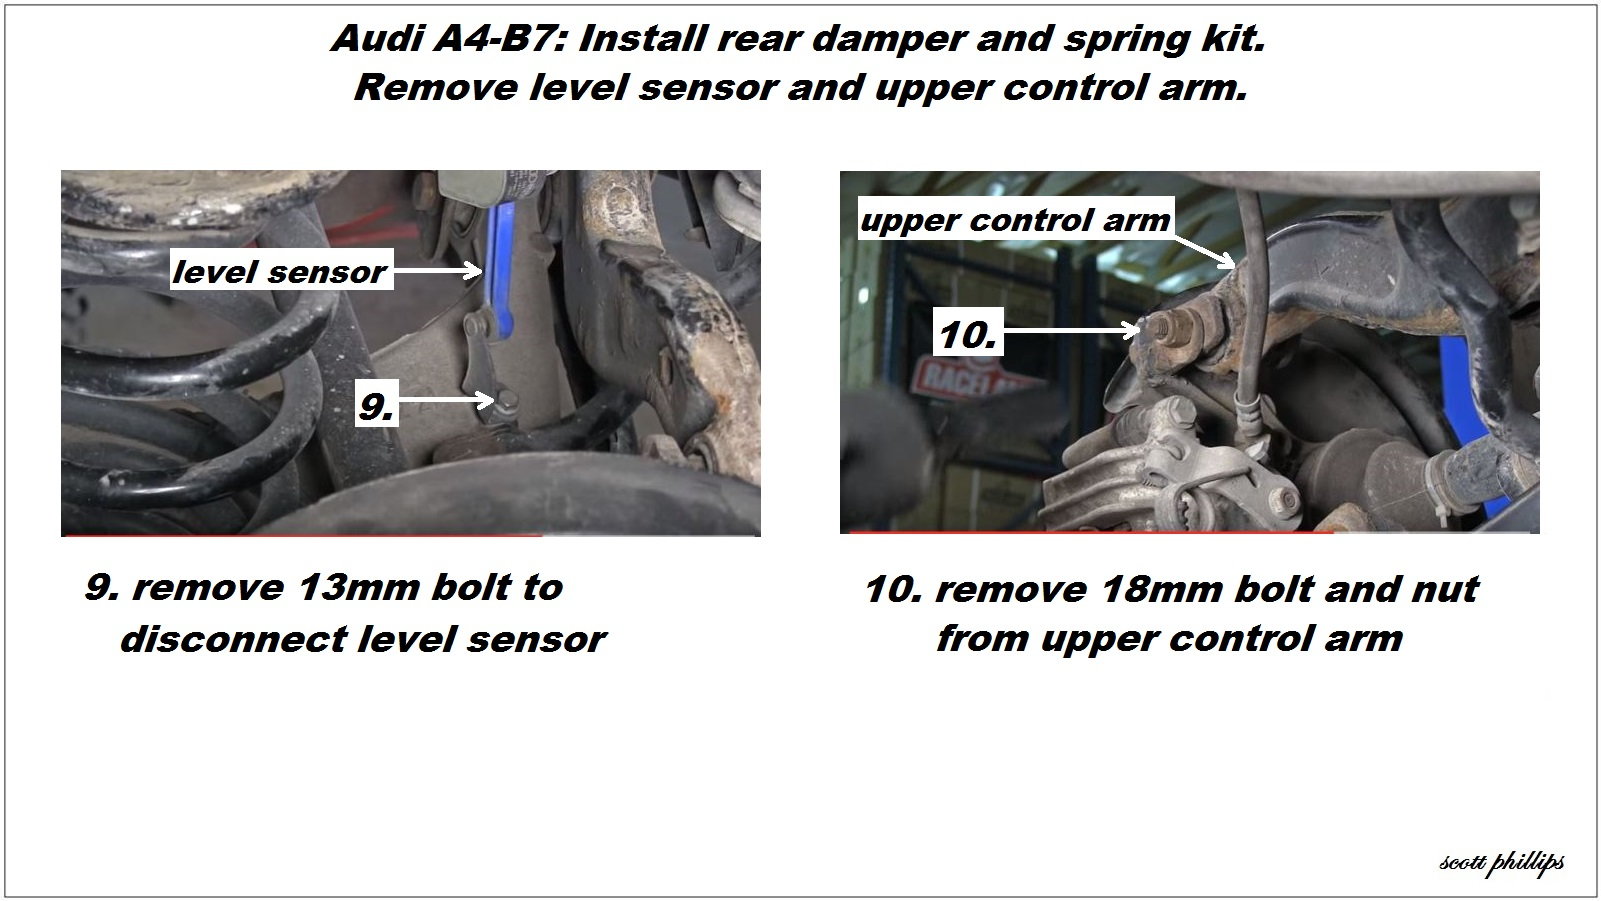
Step 4 – Remove level sensor and upper control arm
- Use the 13mm wrench to disconnect the level sensor.
- Mark the position of the eccentric cam on the upper control arm camber bolt.
- Use the 18mm wrenches to remove the camber bolt and nut.
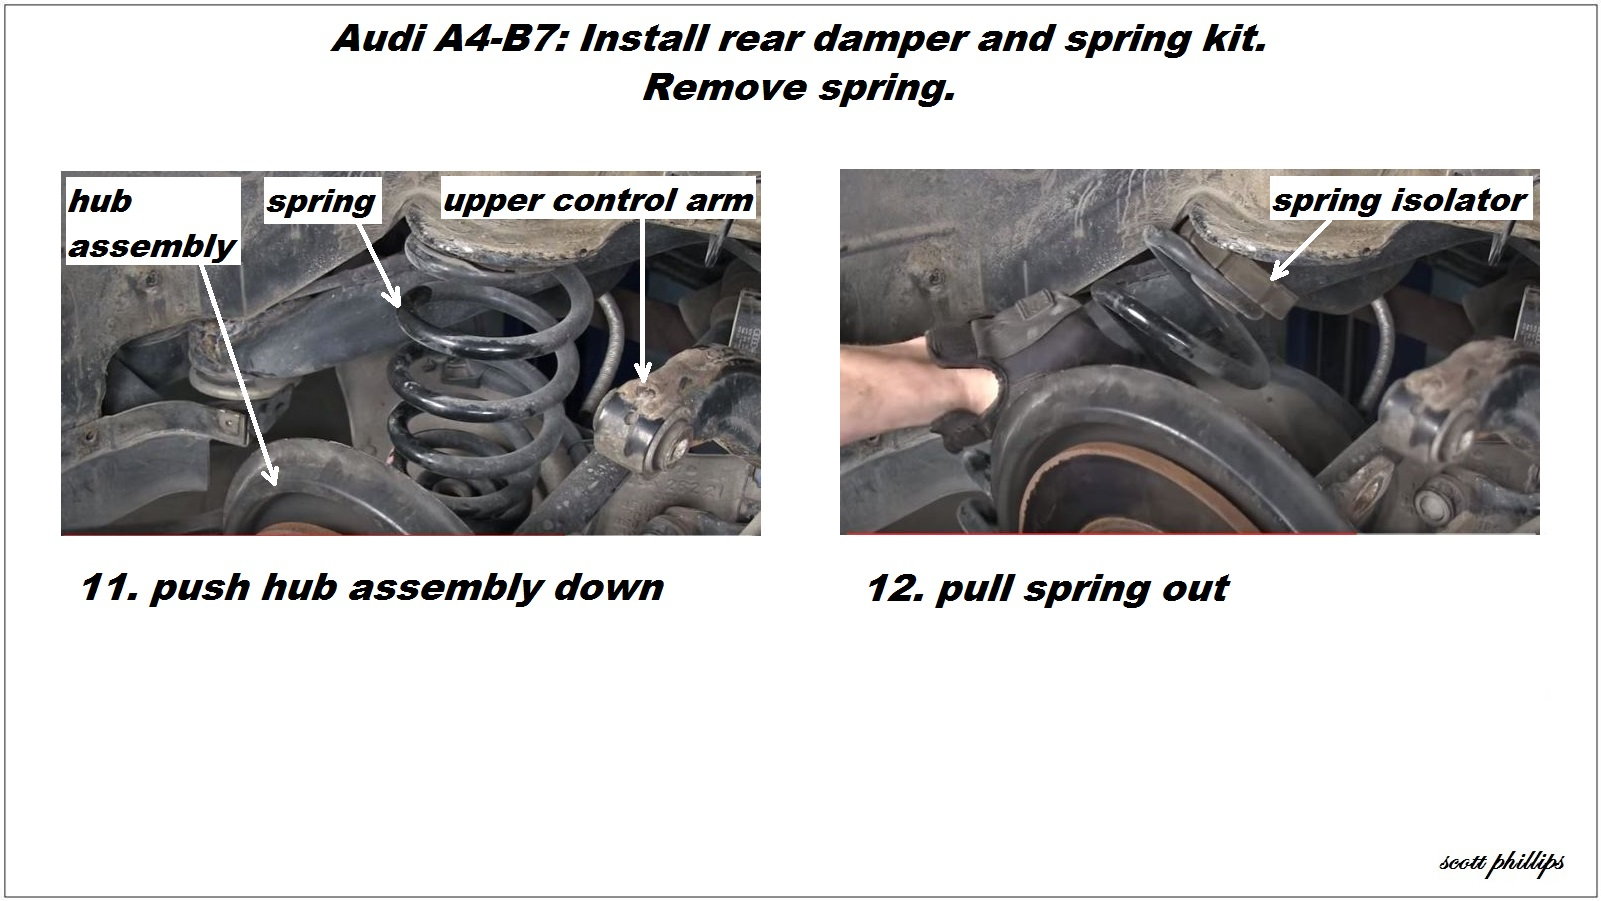
Step 5 – Remove spring
- With the upper control arm disconnected, you can push down on the hub assembly enough to loosen the spring.
- Using a pry bar as needed, pull the spring out.
Step 6 – Replacement of camber bolt
The camber bolt connects the upper control arm to the top of the knuckle. The eccentric rotation of the bolt's cam washer bears on the knuckle, moving the top of the knuckle in and out, to adjust camber. By reinstalling the camber bolt to the mark you made in Step 4, the camber will be very close to correct, at the original suspension height. If the camber bolt is corroded, replace it per Figure 12.

Step 7 – Install new damper and spring
- Swap any Audi parts to the new damper and spring as required by your kit's instructions.
- Installation is reverse of removal.
- Insert all bolts and leave loosely fastened.
- Lower the car off the jacks.
- With vehicle's weight on its wheels, properly torque all the fasteners fully.
Featured Video: How to Install Audi A4 B7 Raceland Coilovers
Suspension Kit Reviews
Raceland B67 |
Black Forest Industries ST 90605 |
Bilstein PSS9 |
ECS Tuning KW V3 Series | |
|---|---|---|---|---|
| Price | $369 | $850 | $1,992 | $2,500 |
| Design | Twin Tube | Twin Tube | Monotube | Twin Tube |
| Damper Adjustability | Fixed | Fixed | 9-Stage Compression/Rebound | 12-Stage Compression |
| Front Spring Rate | 620 lbs/inch | 690 lbs/in | progressive | progressive |
| Rear Spring Rate | 435 lbs/inch | 690 lbs/in | progressive | progressive |
| Lowering Range | 1" to 3" | 1.4" to 2.6" | 1.2" to 2" | 1.4" to 2.5" |
| Finish | Powder Coat | Powder Coat and Gold Zinc | Paint and Triple-C Stainless | Inox-Technology stainless steel |
| Warranty | Limited Lifetime | 1 Year | Limited Lifetime | 2 Years |
Best Value: Black Forest Industries ST
Raceland B67

Price – $369
Design – Twin Tube
Damper Adjustability – Fixed
Front Spring Rate – 620 lbs/inch
Rear Spring Rate – 435 lbs/inch
Lowering Range – 1" to 3"
Finish – Powder Coat
Warranty – Limited Lifetime
The Raceland B67 is a good entry-level kit for lowering on a budget.
Black Forest Industries ST 90605
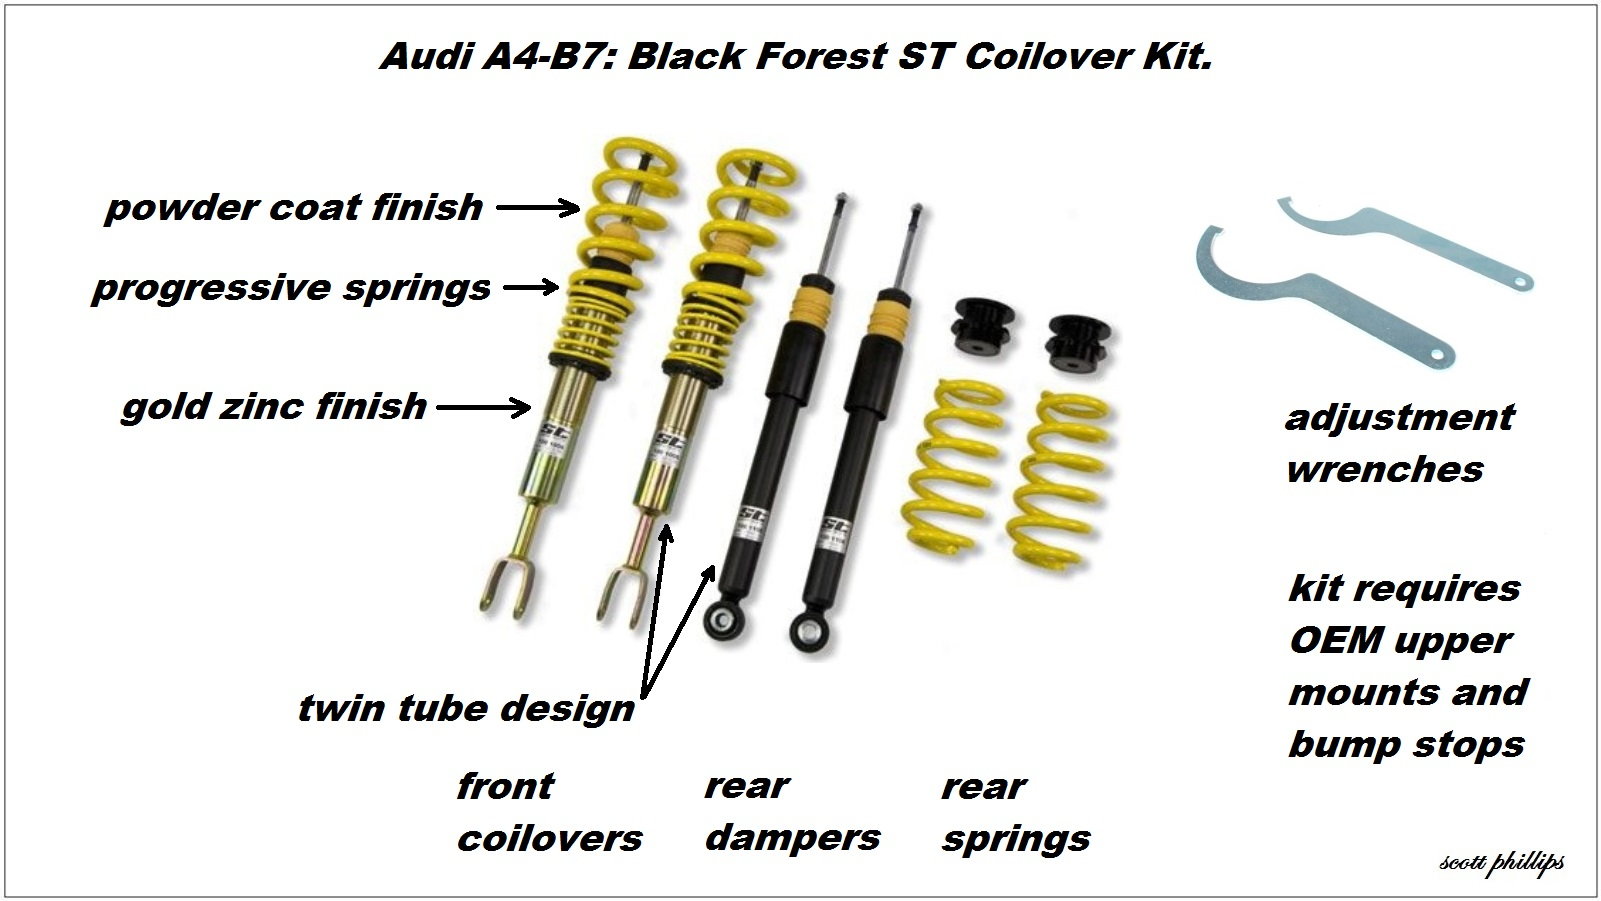
Price – $850
Design – Twin Tube
Damper Adjustability – Fixed
Front Spring Rate – 690 lbs/inch progressive
Rear Spring Rate – 690 lbs/inch progressive
Lowering Range – 1.4" to 2.6"
Finish – Powder Coat and Gold Zinc
Warranty – 1 year
The Black Forest ST is a quality kit, without the expense of adjustable dampers.
Bilstein PSS9
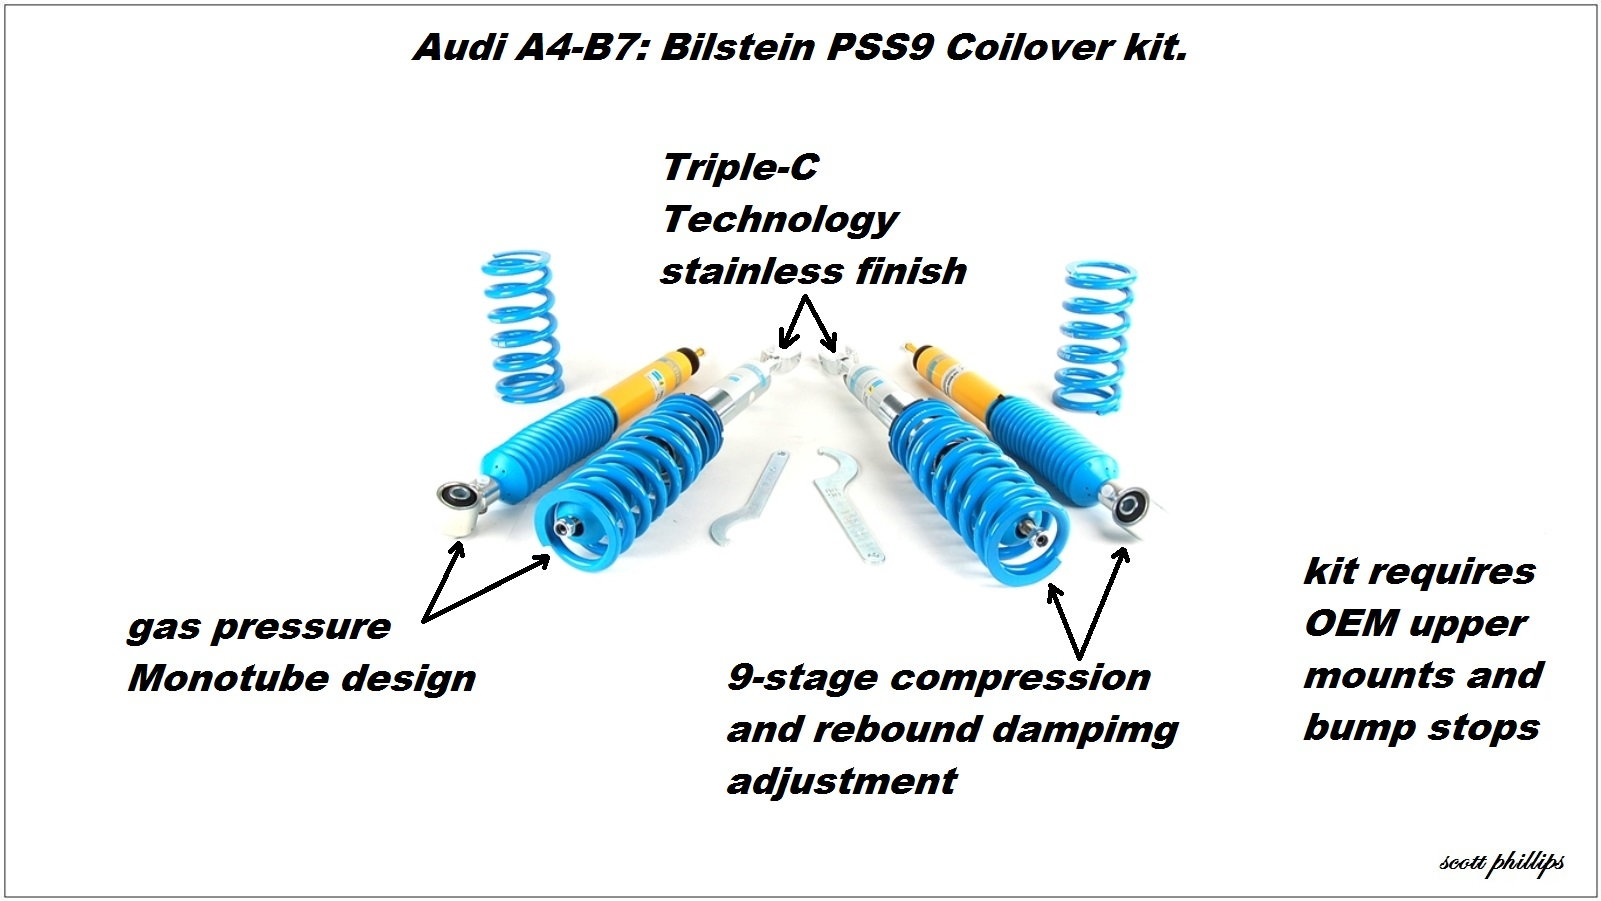
Price – $1,992
Design – Mono Tube
Damper Adjustability – 9-Stage Compression/Rebound
Front Spring Rate – not stated, progressive
Rear Spring Rate – not stated, progressive
Lowering Range – 1.2" to 2"
Finish – Paint and Triple-C Stainless
Warranty – Limited Lifetime
The Bilstein PSS9 has a lifetime warranty and fully adjustable dampers at a competitive price.
ECS Tuning KW V3 Series
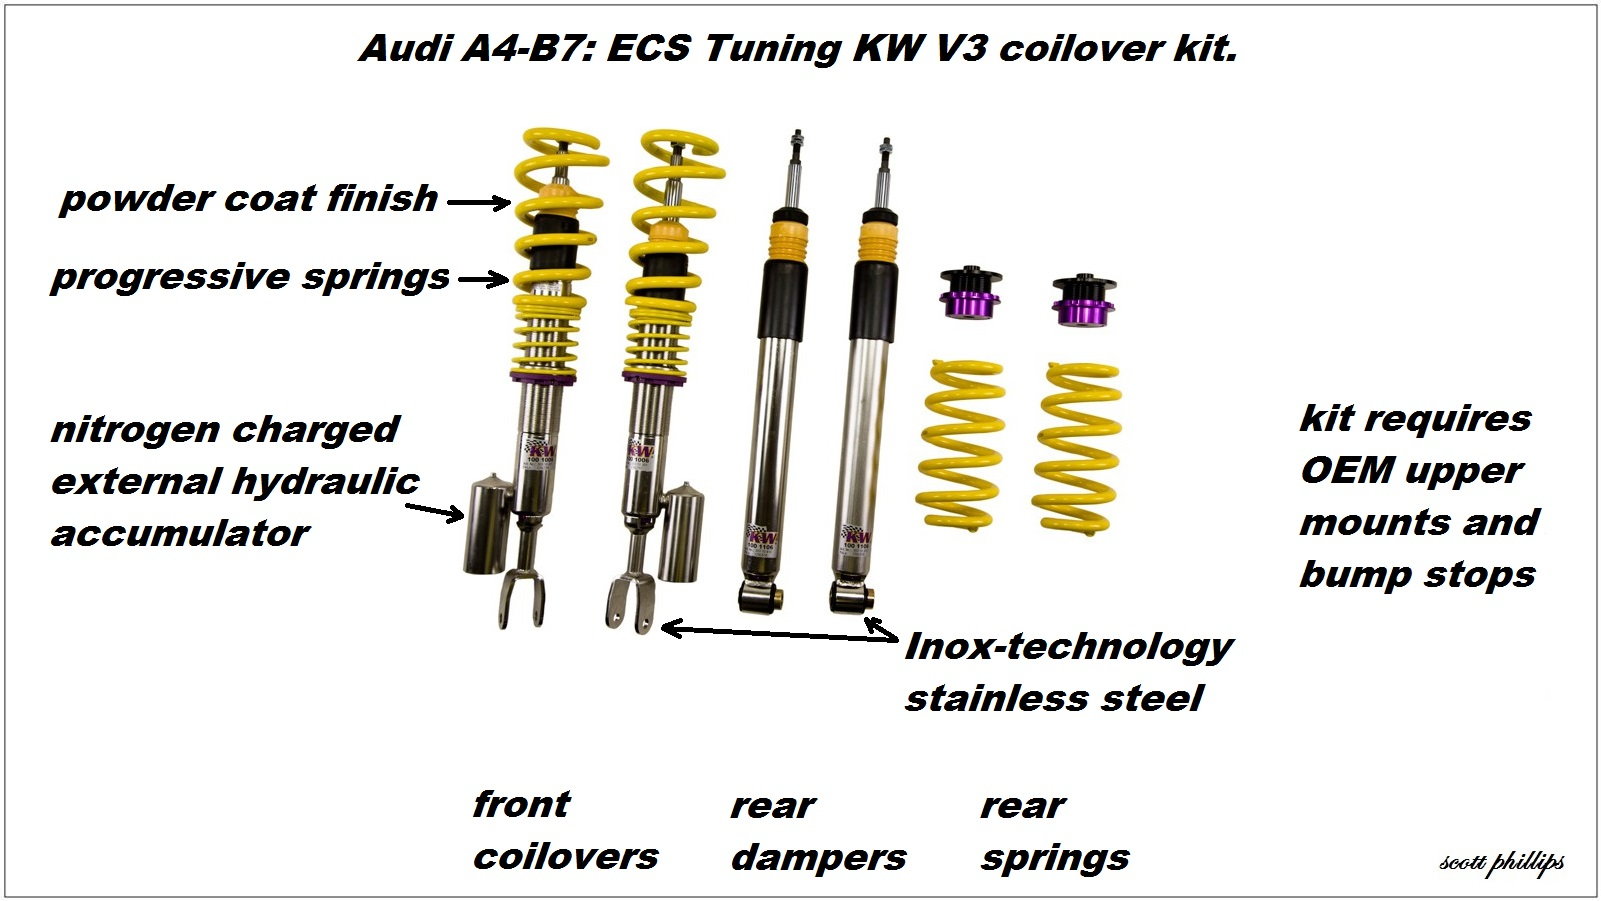
Price – $2,500
Design – Twin Tube
Damper Adjustability – 12-Stage Compression
Front Spring Rate – not stated, progressive
Rear Spring Rate – not stated, progressive
Lowering Range – 1.4" to 2.5"
Finish – Inox-Technology stainless steel
Warranty – 2 years
The ECS Tuning KW V3 spares no expense to be the best of this group.
Pro Tip
Lowering can cause excessive camber. A full four wheel alignment is needed after installing coilovers. If camber exceeds the factory range of adjustment, it can be corrected using adjustable control arms.
Related Article and Sites
- Street Edge Coilovers Review - AudiZine
- Bilstein Sport vs. Heavy Duty - AudiZine
- Best Coilovers - AudiZine
- Suspension Removal and Install - AudiZine
- Audi A4 B7/B8: How to Jack Up Your Car - AudiWorld