Audi Q5: Lowering Modifications and How to Install Lowering Kit
The Audi Q5 is an SUV with a whole new kind of sporty on-road demeanor. If you never plan on going off-road, why not lower it and get an even better on-road experience?
This article applies to the Audi Q5 (2008-2016).
The Audi Q5 is one of the sportiest driving SUVs you can buy, but if you are looking for even more sport and less utility, you can lower it and make it handle like a sports sedan. Some owners prefer to just replace the springs with a set of lower, stiffer units on the stock shocks, while other prefer to fit a whole set of adjustable ride height coilover dampers. No matter which way you choose to lower your Q5, the process is the same: first you have to take off the old shocks and springs, before you can mount up the new coilovers, or fit the new springs. Follow along below and we'll walk you through what swapping out the shocks and springs is going to take.
Table of Contents
How to Install Lowering Kit

Materials Needed
- Floor jack
- Jack stands
- Tire iron
- Impact wrench
- Socket wrench set with various sockets
- Various open ended wrenches
- Spring compressor
- Pliers
- Large flat tip screwdriver
- Hammer
Step 1 – Raise and secure the vehicle
Loosen the wheels on the front of the vehicle using the tire iron. Locate the jack points and raise the front of the vehicle. Chock the rear wheels. Remove front wheels completely and set aside. Get the jack stands under the vehicle and secure in place.
Step 2 – Remove upper control arm links
The upper control arm links will need to be disconnected, and it is easier to remove the bolts at the top of the shock mount, that goes through the bushings. Once the bolts are removed, the control arms can be swung to the side. You will most likely need to remove the sway bar end links as well at this point. It will also be helpful to disconnect the ABS sensors wherever possible for more clearance.
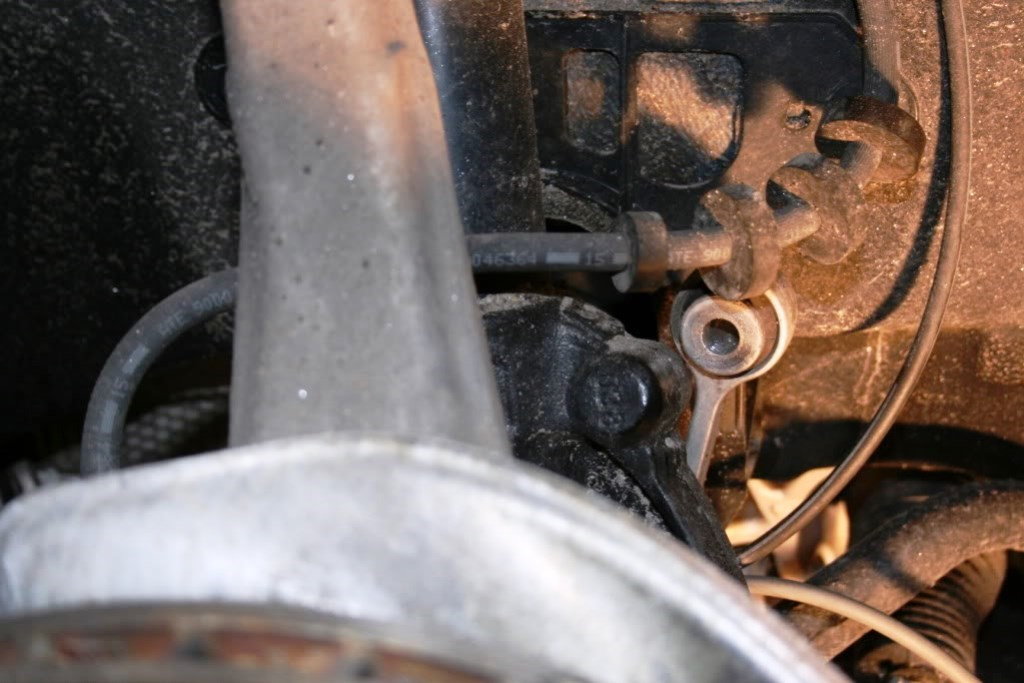
Figure 2. Remove sway bar end link. 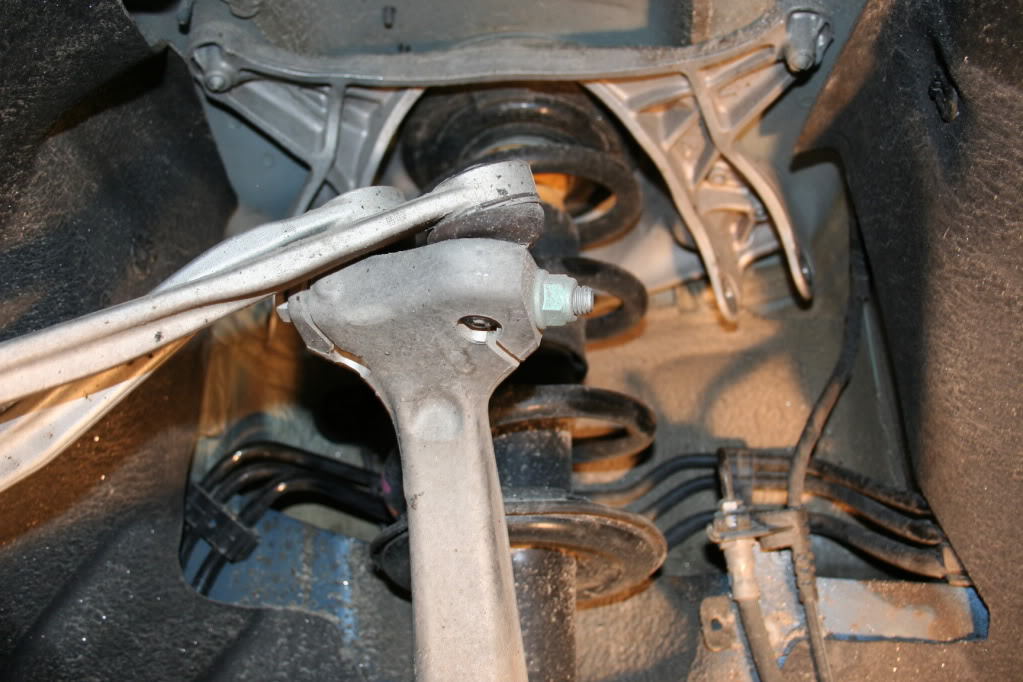
Figure 3. Remove upper control arm links.
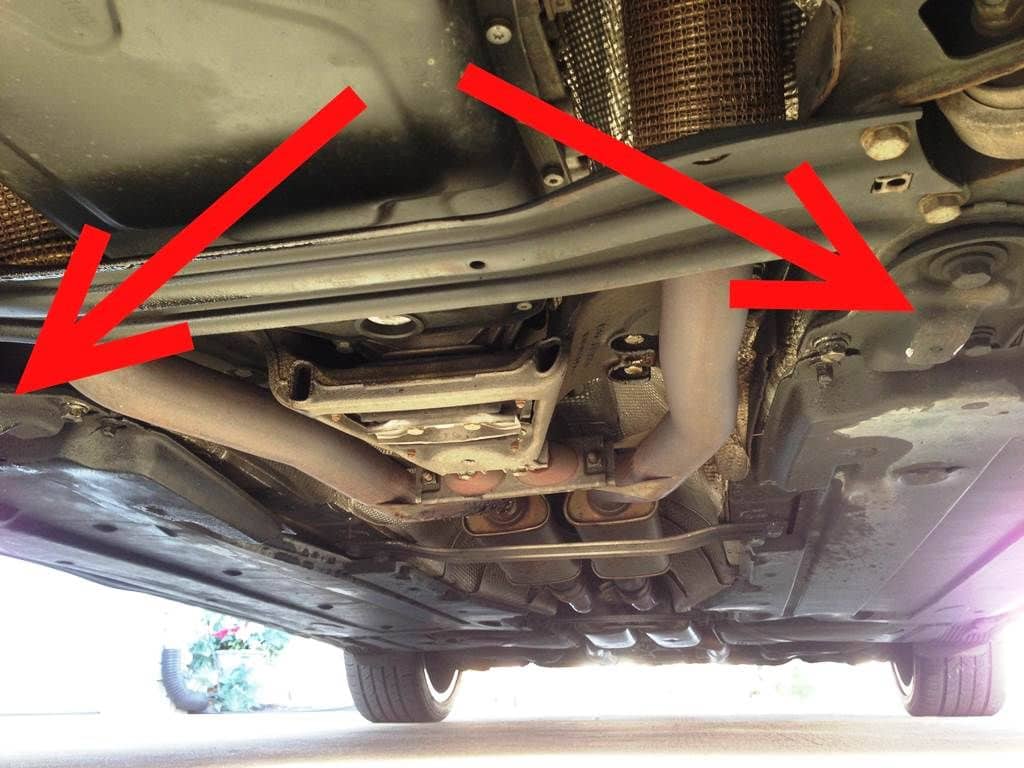
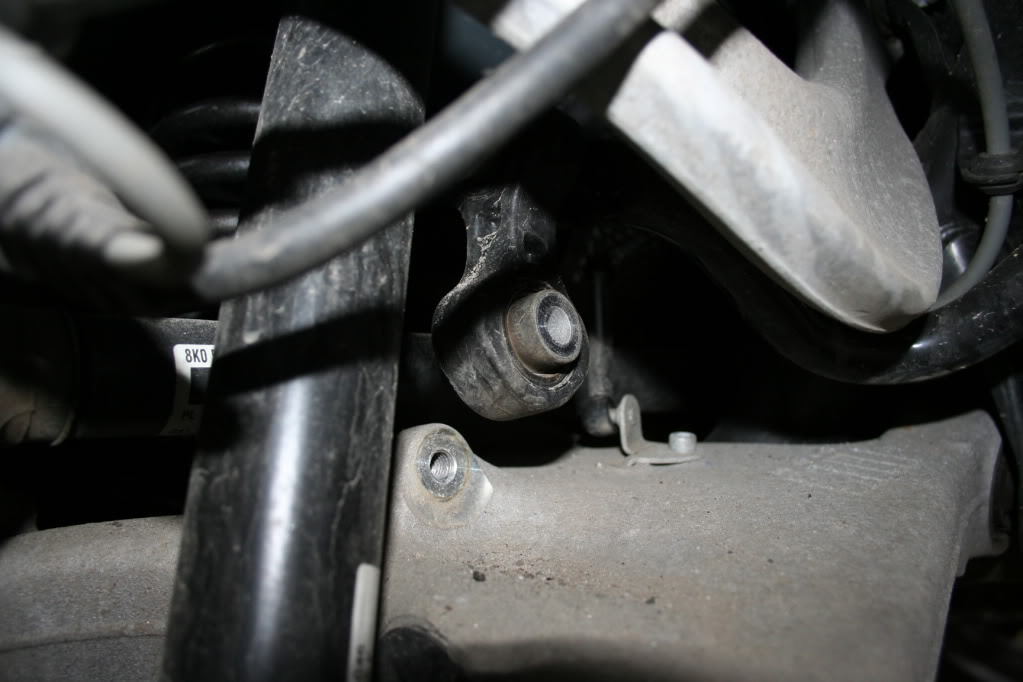
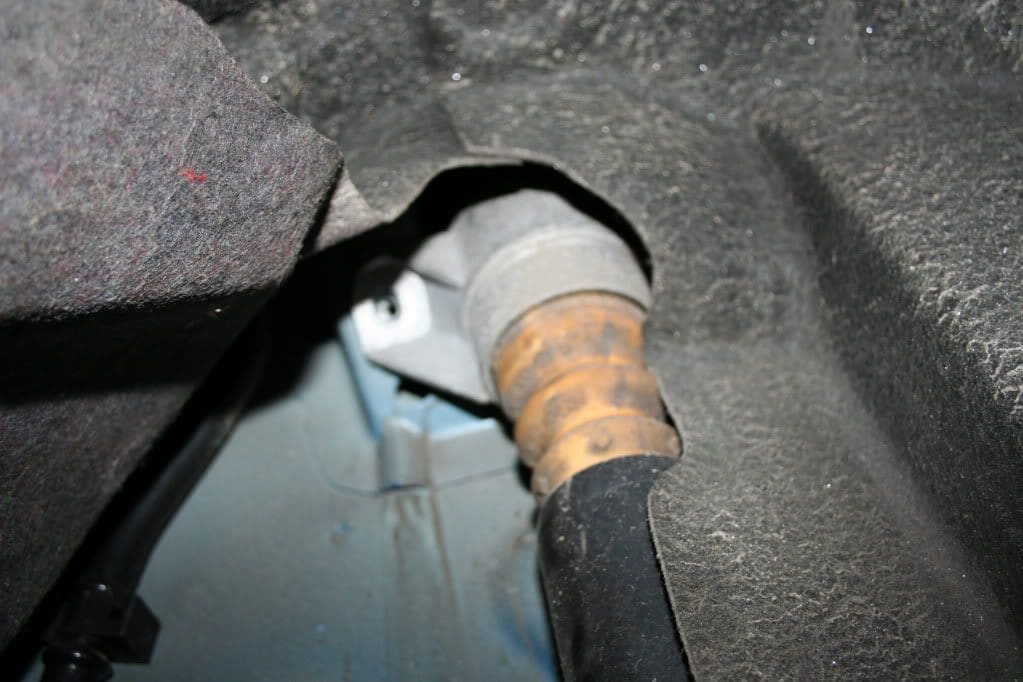
Step 3 – Remove lower shock extension
The lower strut extension is bolted at the A-arm and has a pinch bolt holding it to the shock. You can jack up the steering knuckle to relieve pressure, then remove the bolt to free this. While down here, you can also remove the pinch bolt holding the extension in place.

Figure 4. Location of bolt for strut extension. 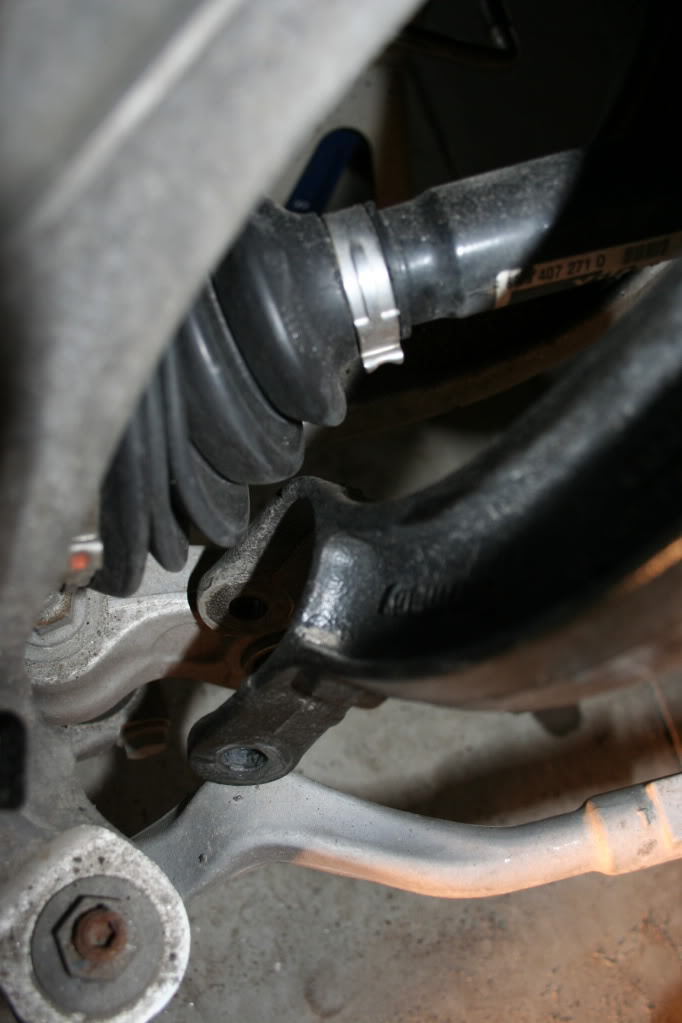
Figure 5. Strut extension pinch bolt.
Step 4 – Free front shock assembly
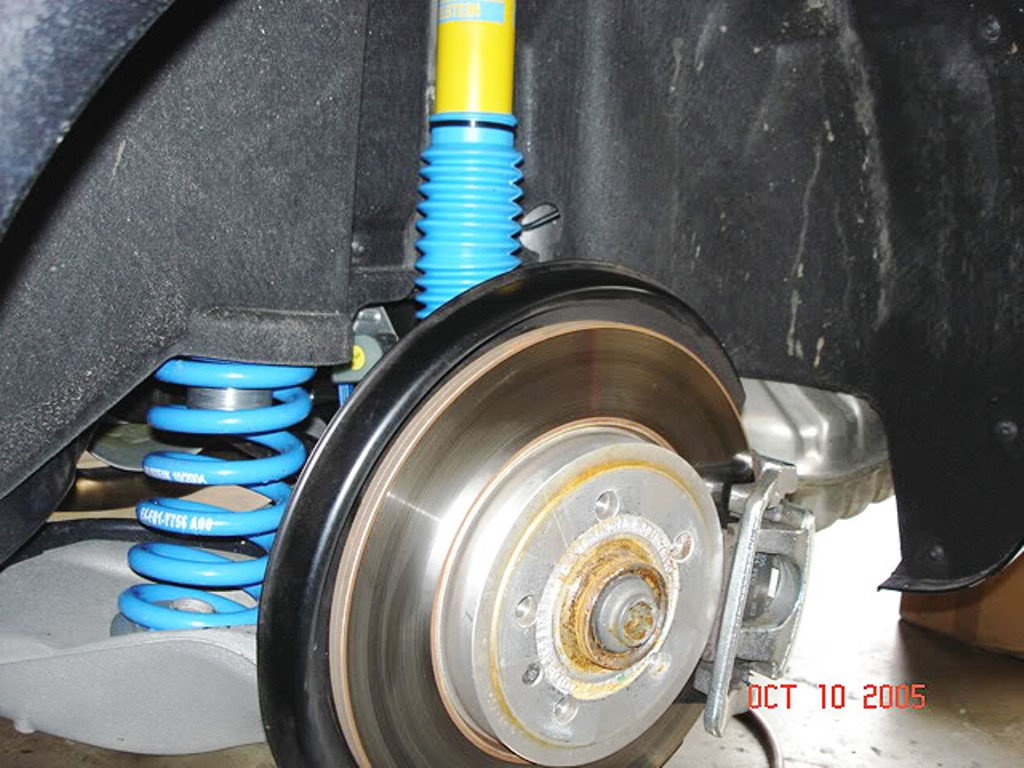
Push the strut extension down while lifting up on the knuckle. You will need to get the extension between the A-arm and tie rod for clearance. Under the hood, remove plastic rain cover to access the four bolts holding the spring hat in place. On the driver side, you will also have to remove the windshield washer reservoir. You will be able to now remove the shock unit as a whole.
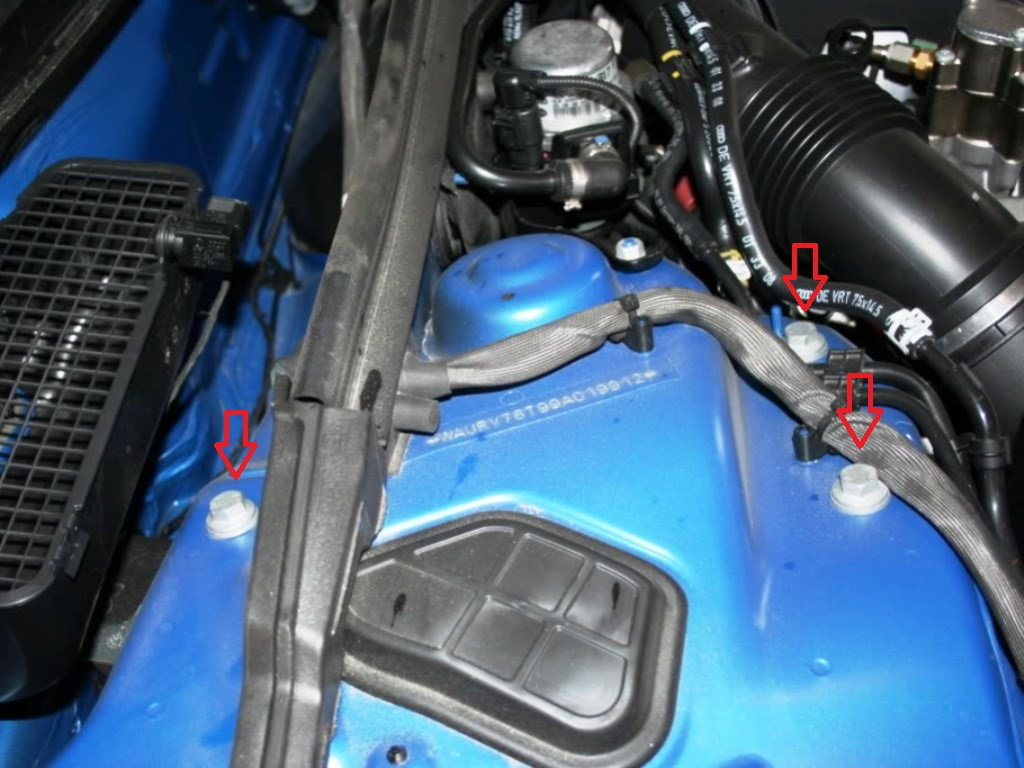
Figure 6. Location of four strut hat bolts, passenger side (only three visible). 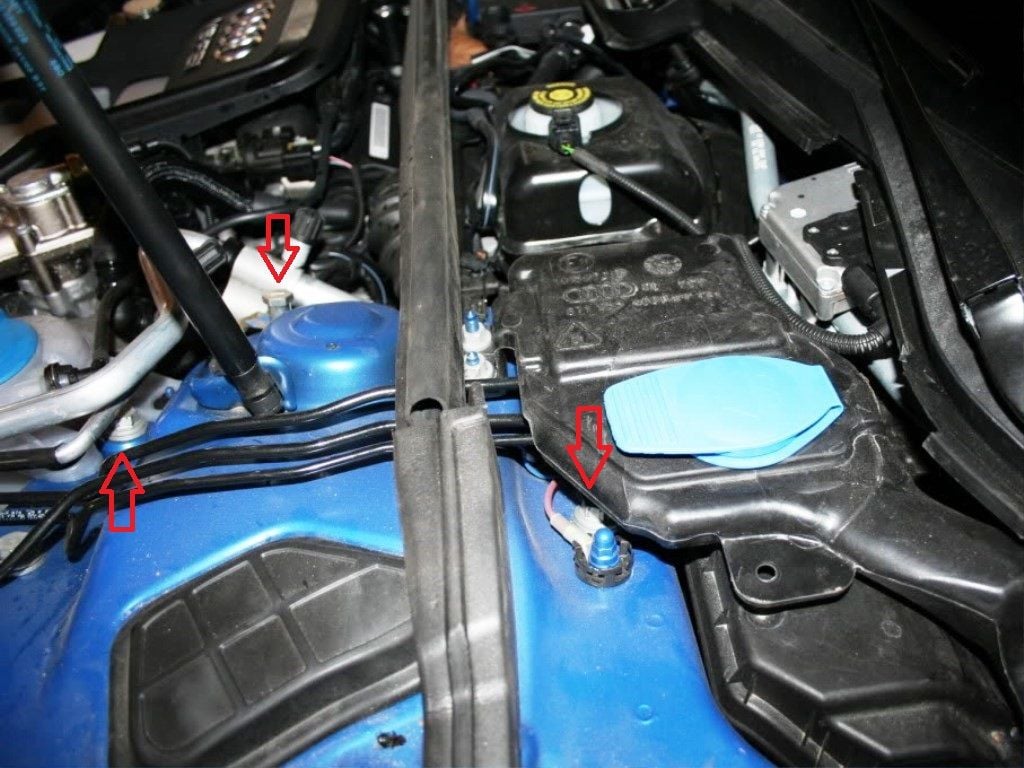
Figure 7. Location of four strut hat bolts, driver side (only three visible).
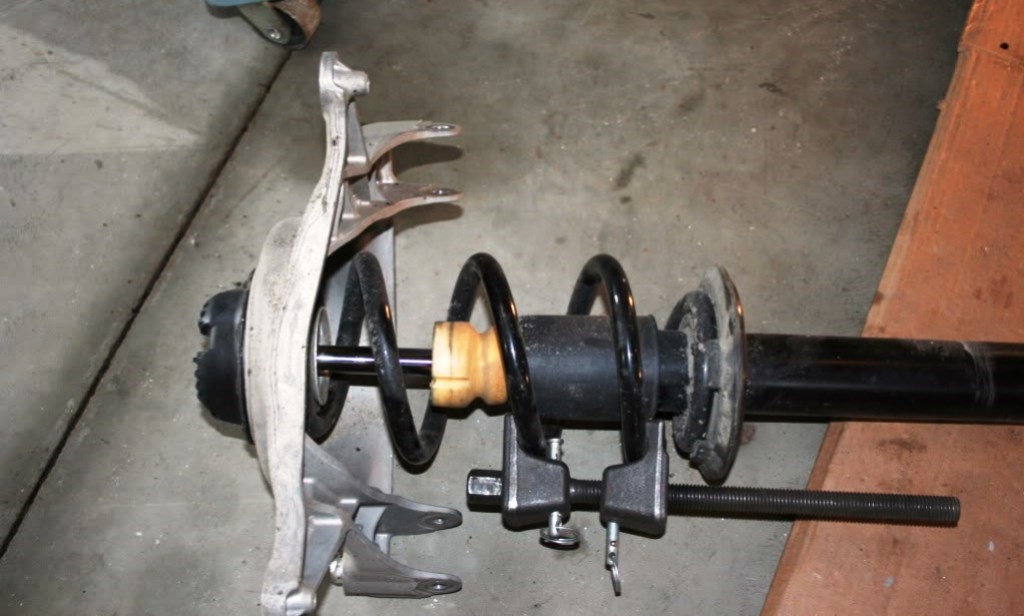
Step 5 – Compress springs on strut assembly
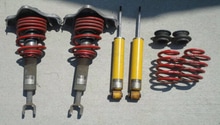
Once the assembly is out, if springs are being upgraded/replaced, the original springs will need to be compressed to remove them from the strut assembly. If a coilover suspension kit is being installed, they will replace the assembly as the entire unit and no decompression/compression of springs should be necessary.
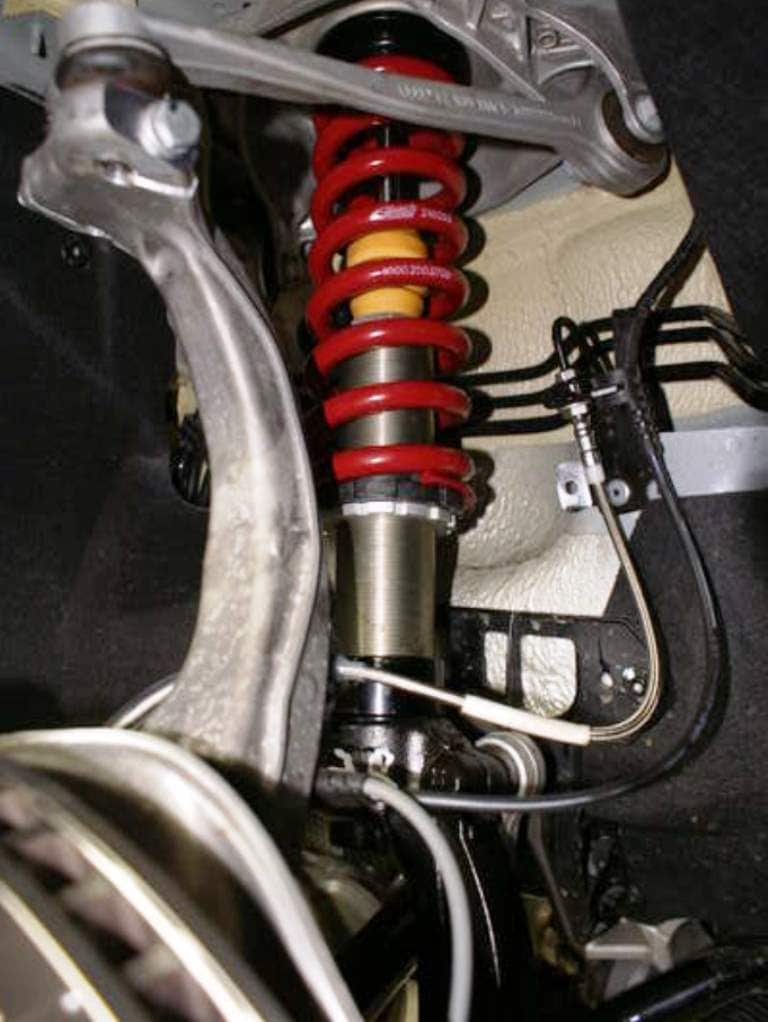
Step 6 – Install new suspension components
After you have compressed the new springs or struts onto your existing assembly, or you are swapping in new coilover suspension, reinstall in reverse order. Assemble new suspension. Secure the top shock mounting bolts loosely. Secure the lower shock bolts. Reinstall pinch bolts. Reinstall wheels and tighten. Remove jack stands and lower the vehicle to the ground. Only with the wheels on the ground can you fully tighten the control arm bushing bolts and sway bar bolts. Then torque the top shock mounting bolts to factory specs. Torque the wheel bolts down to recommended specs.
Step 7 – Prepare rear suspension for removal
Once the front of the suspension is completed, it's time to move on to the rear. Loosen rear wheels with tire iron. Jack the rear of the vehicle and secure front with chocks. Set jack stands and secure vehicle. Remove rear wheels and set aside. Remove any electrical connections, like the ABS or parking brake motor wire, to avoid damaging them. You need to remove the ride height sensor arm as well, if your Q5 is so equipped.
Step 8 – Loosen rear shock mount bolts
Pry aside the plastic fender liner at the rear, so you can access two bolts on the shock hats, then remove them.
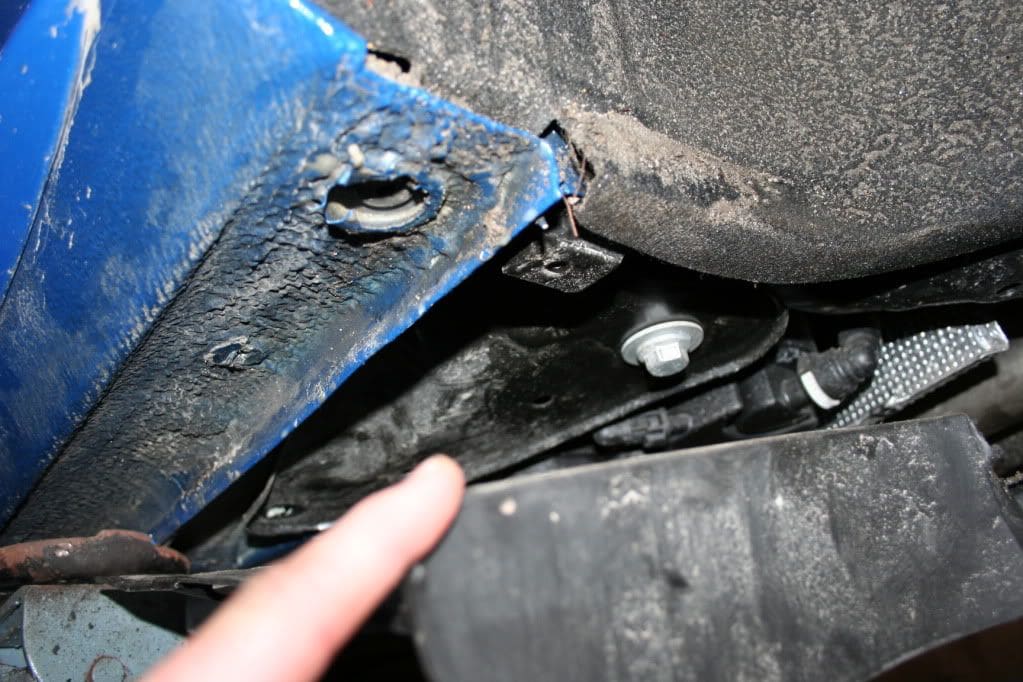
Step 9 – Loosen subframe
The subframe keeps things tight and gets in the way of some fasteners you need to access. You will need to loosen one bolt to bring the subframe down enough to access the bolts holding the damper in place. Torx screws might be holding a splash shield covering the subframe bolt. You can pry this shield aside or remove the Torx screws first. Once the bolt is out, you'll have enough room to remove the two bolts holding the shocks in place. Remove the units as a whole.
Step 10 – Compress rear springs
The rear springs on the Q5 are not cloilover units, but chances are you will still need to compress them somewhat to get them out of their perch. Even if you are reusing your old shocks, taking them out allows the rear suspension to sag at maximum, making removal of the springs easier. An assistant is useful, to stand on the brake hub and press down, further dropping the suspension from the spring.
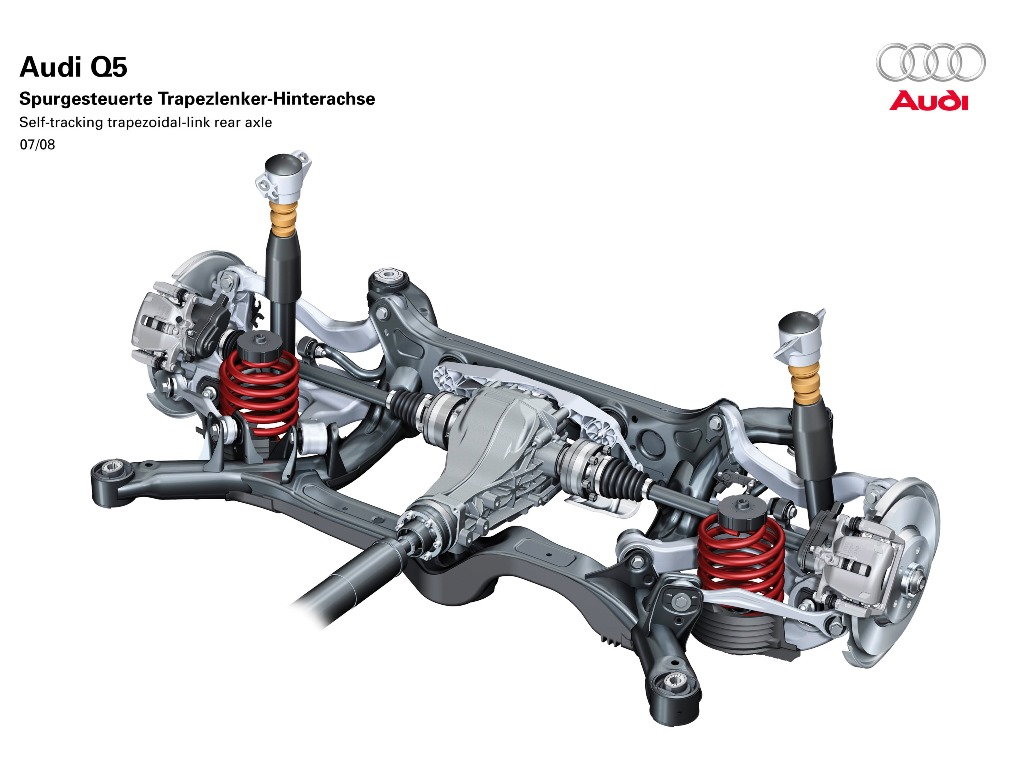
Figure 13. Audi Q5 rear suspension components. 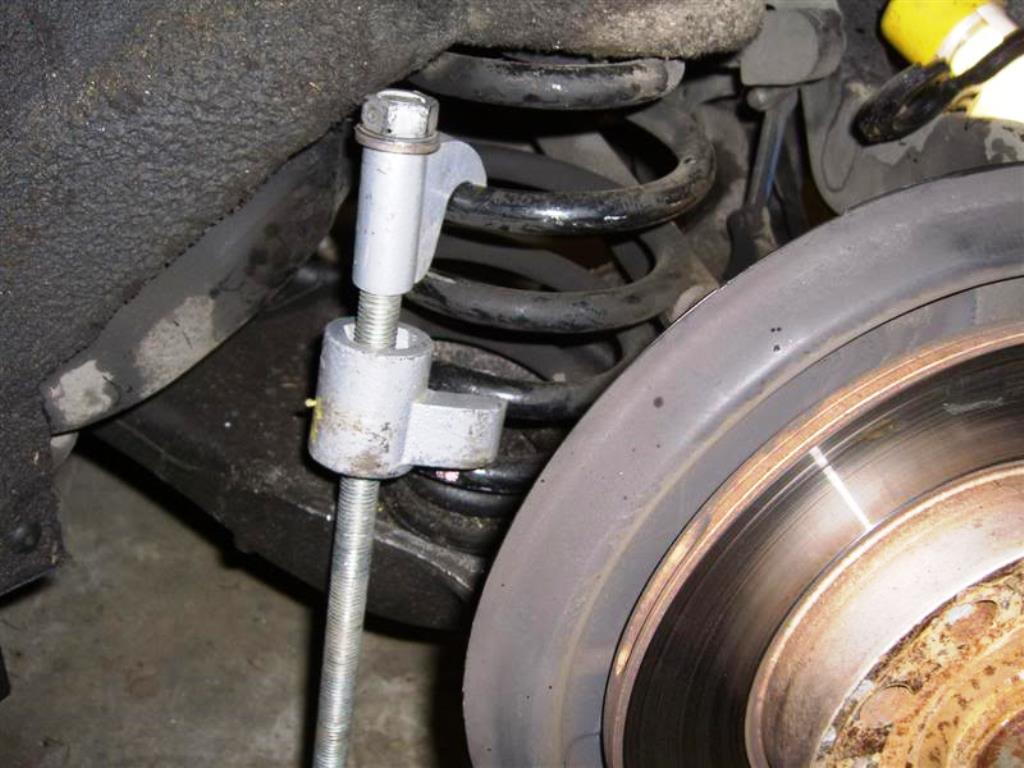
Figure 14. Rear springs still require a compressor in most cases.
Step 11 – Install rear suspension components
Once you have everything together, install is reverse of removal. Most kits don't include true coilvers for the rear, but instead just install new springs in the stock location with adjustable collars. Install the springs and their collars. Secure the shock assembly into rear fender and lower shock bolts. Reinstall wheels and tighten. Remove jack stands and lower vehicle to the ground. Torque control arm bolts to recommended specs only after the vehicle is on the ground. Torque wheel bolts to factory specs.
Featured Videos: Shock Installation
-
Rear Shock Installation
-
Front Shock Installation
Suspension Review
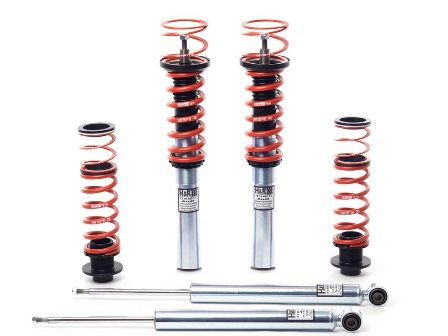
If your struts are giving you a worn out, blown, bouncy feeling, and if they are under warranty, you may just need to visit the dealer. But if you want to increase your handling and lower your Q5 at the same time, it may be time for a set of lowering springs, a new set of springs and shocks, or a complete coilover kit. Below you will find a chart that breaks down various suspension options and their details.
H&R Sport Springs |
H&R Coilovers |
KW Coilover Spring Kit |
Stasis Suspension Kit | |
|---|---|---|---|---|
Price |
$439 | $1,580 | $1,999 | $1,295 |
Adjustable |
No | Yes | Yes | No |
Approx. Front/Rear Lowering |
1.6"/1.5" | 1.5-2.5"/1.5-2.7" | 40-65mm/40-70mm | 1.5"/1.5" |
Warranty |
Limited Lifetime | Limited Lifetime | Limited Lifetime | Limited Warranty |
Best Value: H&R Springs
H&R Sport Springs

Price – $439
Adjustable – No
Approx. Front/Rear lowering – 1.6" / 1.5"
Warranty – Limited Lifetime
Probably one of the most common aftermarket springs on the market, H&R is definitely a step above the OEM suspension springs. Built with super quality and TUV approved, these will pair well with existing or aftermarket strut assemblies. It will also stiffen the ride as well as handling of your vehicle while providing a moderate drop, and allowing a desired look of a lowered vehicle. Recommended for anyone looking for an upgrade over OEM at a low price.
H&R Coilovers
Price – $1,580
Adjustable – Yes
Approx. Front/Rear lowering – 1.5-2.5" / 1.5-2.7"
Warranty – Limited Lifetime
Similar in drop to the H&R springs, at their tallest setting with similar ride and handling, these are thought of as the best of both worlds. Coilovers come equipped with shorter, stiffer springs, new strut assemblies and hardware. Their advantage lies in the ability to allow the user to preset a desired ride height and even have the ability to alter this ride height after installation. Recommended if you want a basic coilover setup with a similar ride to stock.
KW Coilover Spring Kit

Price – $1,999
Adjustable – Yes
Approx. Front/Rear lowering – 40-65mm / 40-70mm
Warranty – Limited Lifetime
KW has a reputation for a better quality damper than H&R, and these are a bit more of the pricey side, but many think they are worth it. KW creates a premium product when it comes to suspension and their quality matches the price tag. Recommended for those looking for the best available coilover setup for a Q5.
Stasis Suspension Kit

Price – $1,295
Adjustable – No
Approx. Front/Rear lowering – 1.3" / 1.5"
Warranty – Limited Lifetime
The Stasis suspension kit is similar in drop to the H&R springs, but priced much more higher. You might expect to get coilovers at this price, but you only get a set of stock style lowering springs, plus a new sway bar. Enthusiasts have claimed good results, however, when it comes to the actual improvement in handling. Recommended for those looking for better handling, not just a lower suspension.
Pro Tip
After you perform any suspension swap or upgrade, it is important to get the car over to an alignment shop as soon as possible. A good alignment will yield even tracking when driving your vehicle and ensure that you don't compromise the tread life of your tires. This is largely due to the camber as well as toe settings becoming out of spec when you remove the standard suspension and related components.
Related Discussions and Site
- Best Q5 Suspension Options - AudiWorld
- H&R Springs Experience - AudiWorld
- Stasis Suspension Experience - AudiWorld
- Suspension Swap DIY - AudiWorld
- Coilover Install DIY - AudiWorld
- Suspension Installation - VWVortex