Audi A4 B8: How to Change Engine Oil
This really easy maintenance work can be done by almost anyone. Audi has made the new oil filter easier to find and replace. Looking after the B8 has taken a turn for the better when considering the work incurred to get the B7's oil changed. Follow along as this how-to article leads you through the steps of changing oil.
This article applies to the Audi A4 B8 (2009-2015).
Changing the oil of a newer A4 is much easier than the B7, mainly due to filter location and the use of a composite filter instead of just a filter element. Getting to the filter itself could not be easier, as it is in front and center as you pull the cover off of the engine. There should be no major fear of oil spillage during removal, as the filter should have a drainback valve, which keeps the filter from draining all over your engine. Getting to all of the areas of the vehicle you need to get to is very easy. The hardest part is removing the belly pan, which is no big deal. Read on to find out the particulars of this very important maintenance. It should be noted there are ways in which you can change the oil from the top side using an oil extractor. This process may be worth your investigation, as you never have to get under the vehicle, nor extract the belly pan in order to change the oil.

Materials Needed
- T45 Torx head socket and matching ratchet
- Drain pan
- Filter wrench
- Oil funnel
- Nitrile gloves
- Shop rags
- Jack, jack stands, and wheel chocks (alternative: vehicle ramps or lift)
It is highly recommended you change the oil pan plug when changing the oil from the bottom side. At the very least, change out the small metal washer which goes on the plug. If you don't, it is highly likely the plug will leak.
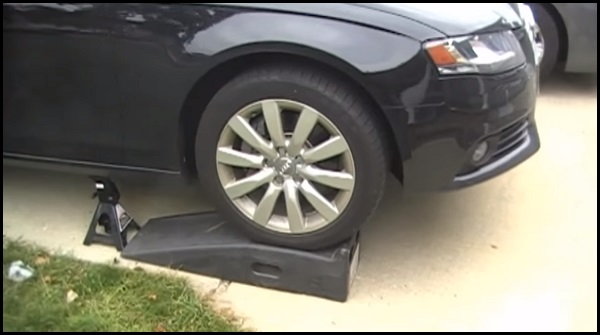
Step 1 – Jack up and support the vehicle
Put the transmission in gear if a manual, or insure it is in park for an auto. Set the emergency brake and place wheel chocks to the front and rear of one rear tire. Jack up the front end of the vehicle and place securely on jack stands. Alternatively, roll your Audi up on ramps, then set the parking brake and leave in gear if a manual transmission.
Step 2 – Drain the oil
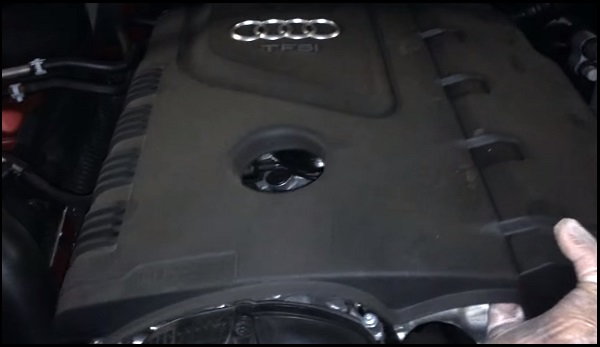
If you haven't done so already, pop the hood, raise, and support it. Pull the engine cover (Figure 2). This can be done with a decent little tug.
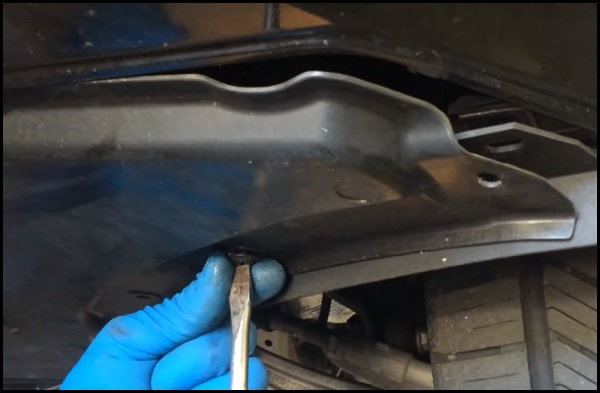
Clean around the oil filler cap to ensure no dirt falls in during oil change operation. Remove the oil filler cap. From under the car, remove the belly pan by using a flat tip screwdriver to remove all of the 1/2 turn screws. These should pop out as soon as they are loose. If you find a screw which has threads, you are unscrewing the wrong screws. There are several of the screws, mainly around the perimeter of the belly pan. Place the drain pan under the car at the oil pan plug location. Start to remove oil plug (Figure 3). As soon as the plug starts to loosen, engine oil will start to flow out from around the plug. This is normal, but ensure the drain pan is in place or you will spill oil. When ready, completely remove the bolt with your fingers, ensuring the oil drains properly into the drain pan.

Step 3 – Change oil filter
In the engine bay, loosen the oil filter using the filter wrench. Continue to unscrew the filter by hand (Figure 4) until it comes lose from the filter housing. The filter comes with an anti-drainback valve, which will keep it from leaking all over the place. Be aware, some oil will still leak from the filter, but nothing which cannot be easily cleaned up.

Using a rag, clean up the filter area for any spilled oil. Using fresh, clean oil, wipe a thin film of oil onto the oil filter gasket. Install the new filter into the filter housing. Tighten fairly tight using your hands only. Replace the engine cover.
Step 4 – Fill the oil
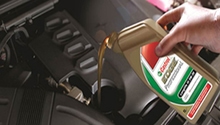
Back under the vehicle, replace the oil pan drain plug into the sump, using a new washer to help it seal. Carefully remove the drain pan from under the car to avoid spillage. Wipe the oil pan to clean up and errant oil. Once satisfied, replace the belly pan (Figure 5). Fill the oil to exactly 4.6 quarts. Bring the vehicle off of the ramps or down from the jack stands so the vehicle sits level to the ground. Start and run the vehicle, allowing the engine to warm up for about a minute or so to get it to normal operating temperature. Check for leaks while engine is warming up. Shut off the car, then turn the ignition back to the on position, ensuring you do not touch the brake pedal.
Step 5 – Reset the oil change interval
At the audio console, press the Car button to bring up the display in the MMI. Scroll down to highlight Oil Level and select. The MMI will indicate there is currently no information available about the oil level. Let the car sit like this for a couple of minutes. When the system detects the oil level, it will be displayed. Ensure the level indicates the max level. If lower than that, you may need to add a slight bit more oil to get it filled up all the way. Next, press the Return button. Scroll down to Service Interval Display and select. Next, select Reset Oil Change Interval. When prompted to reset, select Yes. Your oil change interval is now reset.

Featured Videos: Audi A4 Oil Change
-
Audi A4 B8 Oil Change How-to
-
2009+ Audi A4 Oil Change and Level Check
Related Discussions
- Top Down Oil Change - AudiWorld
- Correct Way to Change Oil A4 - AudiWorld
- 2015 A4 Oil Update - AudiWorld
- What is Normal Oil Consumption - AudiWorld
- Advice Needed Oil Small Issue Plugs - AudiWorld