Audi: How to Fix a Tire Leak
Don't let the leaky or flat tire on your Audi A3 keep you stranded. Keep reading to learn how to fix it in no time.
This article applies to the Audi Q5/Q7, A3, A4 B7, A4 B8, A6 C5, A6 C6.
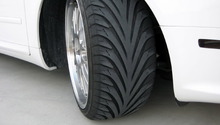
Spotting a leak in a automotive tire is not always as simple as looking directly at the rubber and seeing the culprit. Sometimes, you have to actually inspect the tire by hand to find a slow or less pronounced leak. In such cases, you'll want to take your time to ensure you don't overlook the leak or only spot one leak when others may also be present. Once you've spotted the leak(s), you'll need to properly repair the damage. In most cases, repairing a tire leak is a straightforward do-it-yourself project that requires just an hour or so to complete. Here's how!

Materials Needed
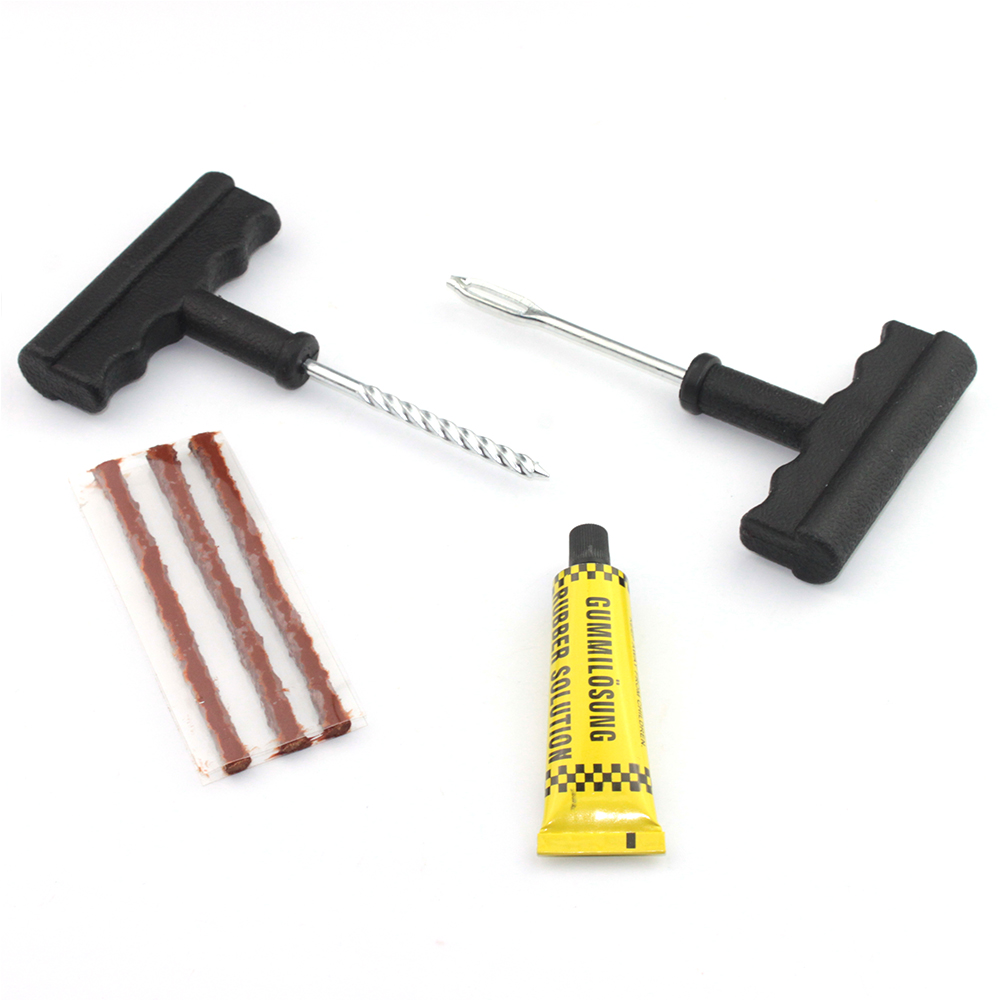
- Tire repair patch kit with rubber cement glue
- Car soap or dish detergent (with water)
- Rag (optional)
- Spray bottle (optional)
- Bucket (optional)
- Rasp tool
- T-handle tool
- Pair of dykes
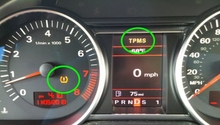
Step 1 – Inspect your tire(s)
Before you can stop a leak, whether by patching it or plugging it with a sealant material, you'll first need to inspect your tire(s) for damage.
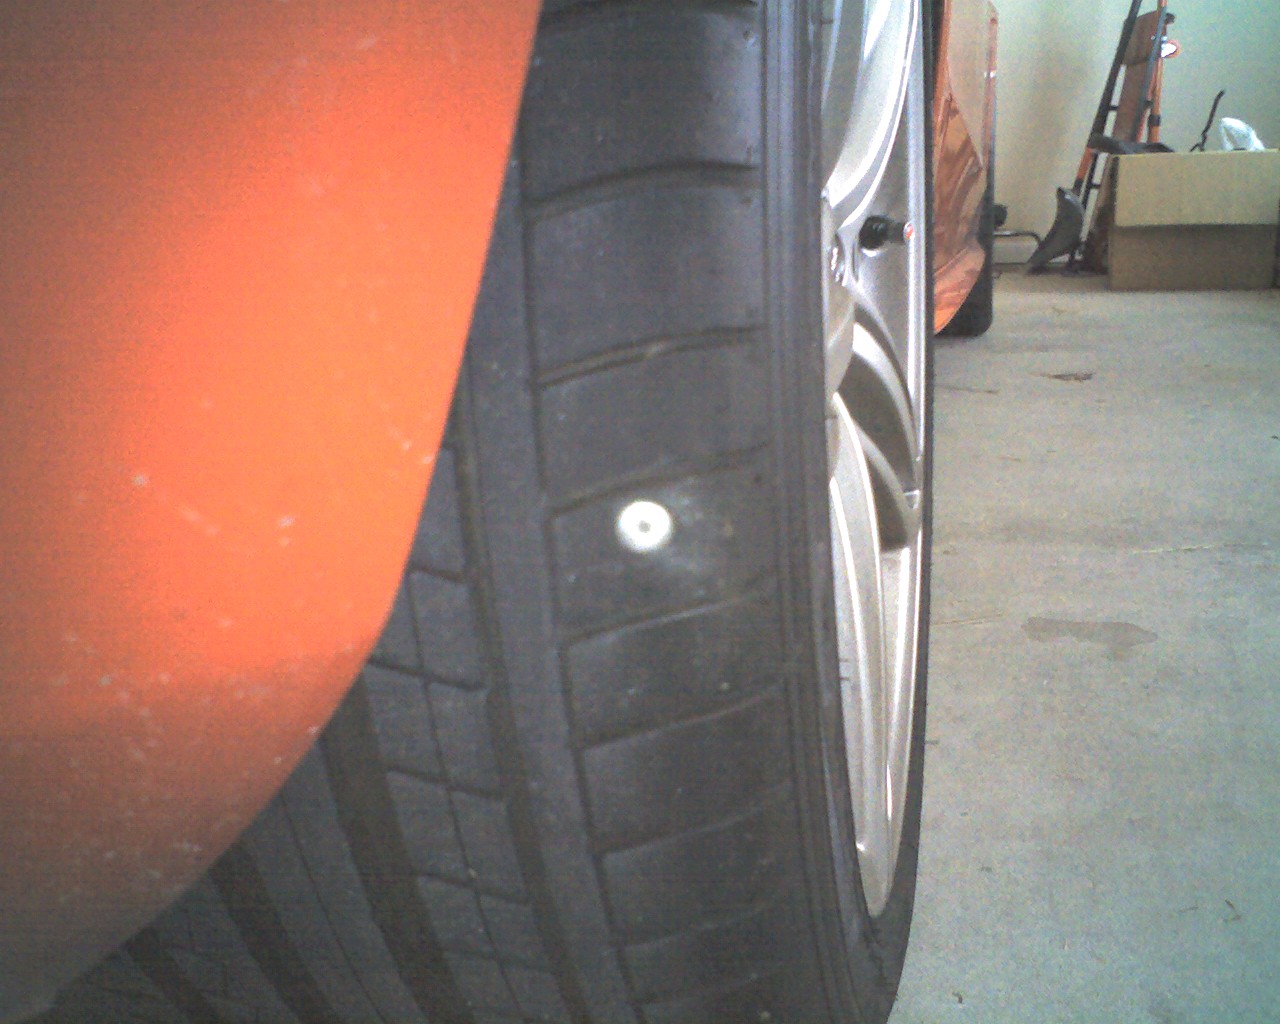
- Search for protruding objects, such as nails, glass or road debris, and then remove the item using a pair of dykes.
- If you cannot identify the exact location of the leak by sight, then mix together a soap and water solution and perform the following do-it-yourself test.
- Apply the soapy solution to your tire(s) using a rag (soaked in the solution) or a spray bottle.
- If you see bubbles, then you have spotted the leak(s).
Pro Tip
Don't drive on a leaky tire. Instead, mount a spare tire to your wheels, and then fix the leak when you return home.

Step 2 – Patch the tire
- The first thing you'll want to do is expand the actual size of the hole using the rasp tool that came with your kit.
- Be sure to rotate the rasp tool in a complete circle for several passes.
- Leave the rasp tool in your tire while you move on to your plug patch.
- Next, thread the plug patch through the end of the T-handle tool.
- Bring the plug patch forward by about 50% so the same amount of material sticks out on either side.
- Coat the plug patch with a liberal amount of cement.
- Pull out the rasp tool.
- Insert the plug patch into your tire by pushing down on the T-handle tool.
- Make sure the plug patch is fully inserted into your tire before releasing your hands.
- Remove the T-handle tool, and then cut away the excess plug patch using your dykes.
Pro Tip
As a general rule of thumb, experts warn against attempting to patch the sidewall of a tire. Opinions differ on whether or not it's safe to patch a low-profile tire. Use your own discretion or seek the advice of a local mechanic.
Step 3 – Check again for bubbles
- Spray your tire once last time with the soapy solution you used in Step 1.
- Check for air bubbles along the hole.
- If you've plugged/patched your tire properly, then there won't be any air bubbles.
- If you didn't, then there will be, and you will need to re-do Step 2.
- If you are experiencing a great deal of difficulty in repairing your tire(s), it's highly recommended that you stop and seek professional assistance. You don't want to ruin your tire.
Featured Video: Quick Tip on How to Patch a Tire
Related Discussions
- DIY Tire Leak Repair - Audiworld.com
- Damage to Sidewall of Tire - Audiworld.com