When you click on links to various merchants on this site and make a purchase, this can result in this site earning a commission. Affiliate programs and affiliations include, but are not limited to, the eBay Partner Network.
Feel free to check out my installation on a 2017 Q7. I know it's a different car, but they should share a similar route for the wire.
Thanks. You have nice install but I would like to connect to mirror and eliminate any wires and connection to lighters. I did this in my non-audi cars.
Thanks. You have nice install but I would like to connect to mirror and eliminate any wires and connection to lighters. I did this in my non-audi cars.
Ok then check out my hardwire install via mirrortap on our '17 Q7. No wires showing other than one coming straight from the base of the rearview mirror straight to the dashcam. Should be able to do the same on a B9 A4!
Ok then check out my hardwire install via mirrortap on our '17 Q7. No wires showing other than one coming straight from the base of the rearview mirror straight to the dashcam. Should be able to do the same on a B9 A4!
Well done. Coincedentialy I spent yesterday evening install my cam before reading your report
I will post some pics here. The most tricky part was cover opening.
Well done. Coincedentialy I spent yesterday evening install my cam before reading your report
I will post some pics here. The most tricky part was cover opening.
If you could post the pics and some steps you took, that'd be great.
I ordered a BlackVue that I want to connect to the Mirror.
Ok. Here is my experience to do hardwired dashcam installation on Audi A4 2017 Prestige.
YOU DO AT YOUR OWN RISK. If you don't know what are you doing - ask professional services - they are happy to take care of you My quote for this job was 5 hours at $90 rate (+ taxes of course).
First there are some preparation.
1) You need get plastic Bar Scrapers for trim removal. You can get it from Home Depot.
Like this - https://www.amazon.com/Panel-Removal...dp/B00ZRJCYQ2/ What you really need from this kit is that piece
3) You actually need dashcam. I spent some time to read reviews and watch sample videos. This one is good enough - Dome DAB 201. https://www.amazon.com/gp/product/B01CKSEG2M/
Only drawback is external GPS module, but it is ok.
If you prefer different camera - trust me - you only need camera that built used Ambarella chip.
I measured how much juice it needed - 0.5A
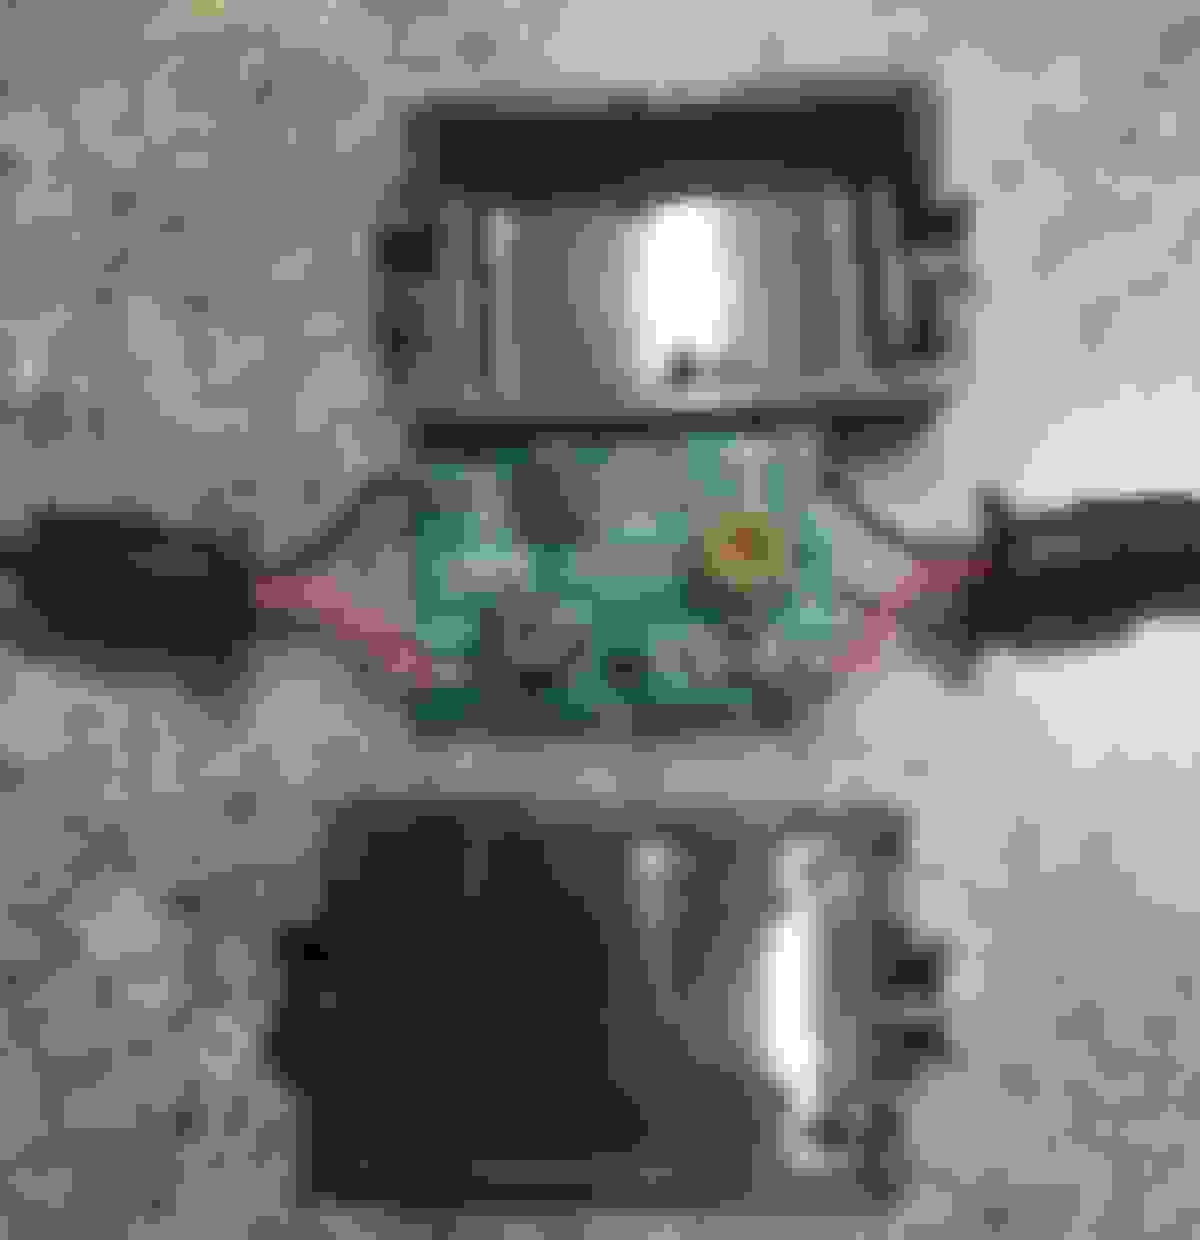
4) Preparatory step. You need to do some soldering at your garage/shop/lab/kitchen table Wires with converter so long - you need cut them and do much shorter. Below is the process. You open box with knife. Unsolder, cut, solder and glue back box cover.
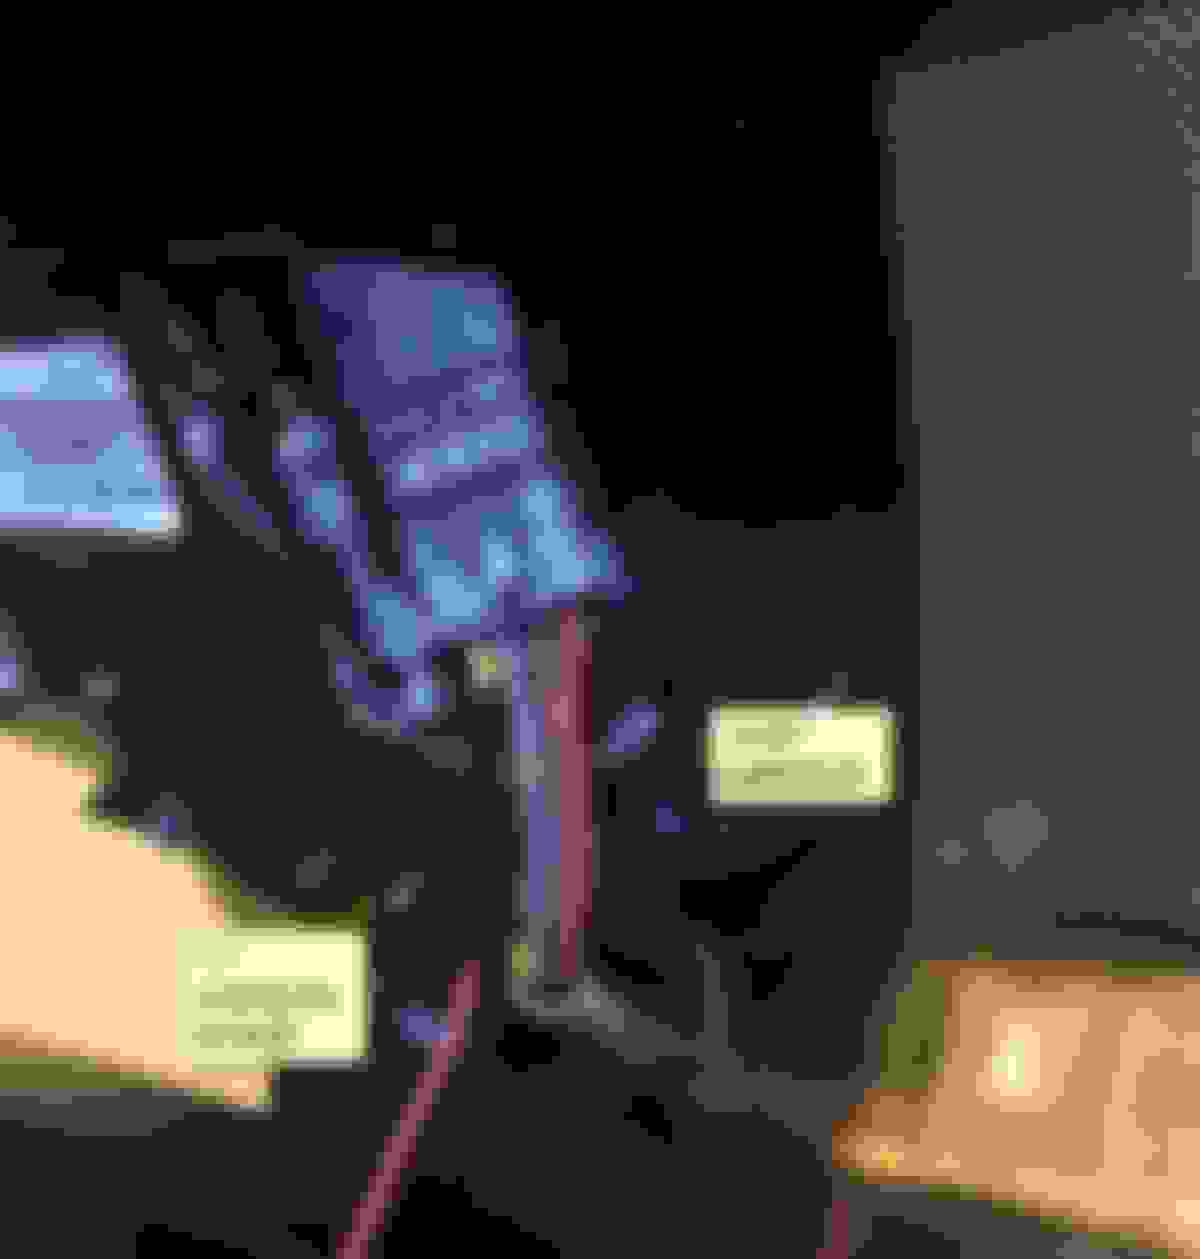
5) Now you are ready for your adventure. Use bar open cover behind the internal mirror. Place it between windshield and plastic and gently pull until it clicks. Do one side first, then second side. Fifth clip is down, but after all 4 free up, you just flip cover.
6) Find switched +. Use needle and tester. In mine car it is YELLOW wire. It is off when ignition is off and "hot" when ignition is off. For "-"/ground I used bolt/screw.
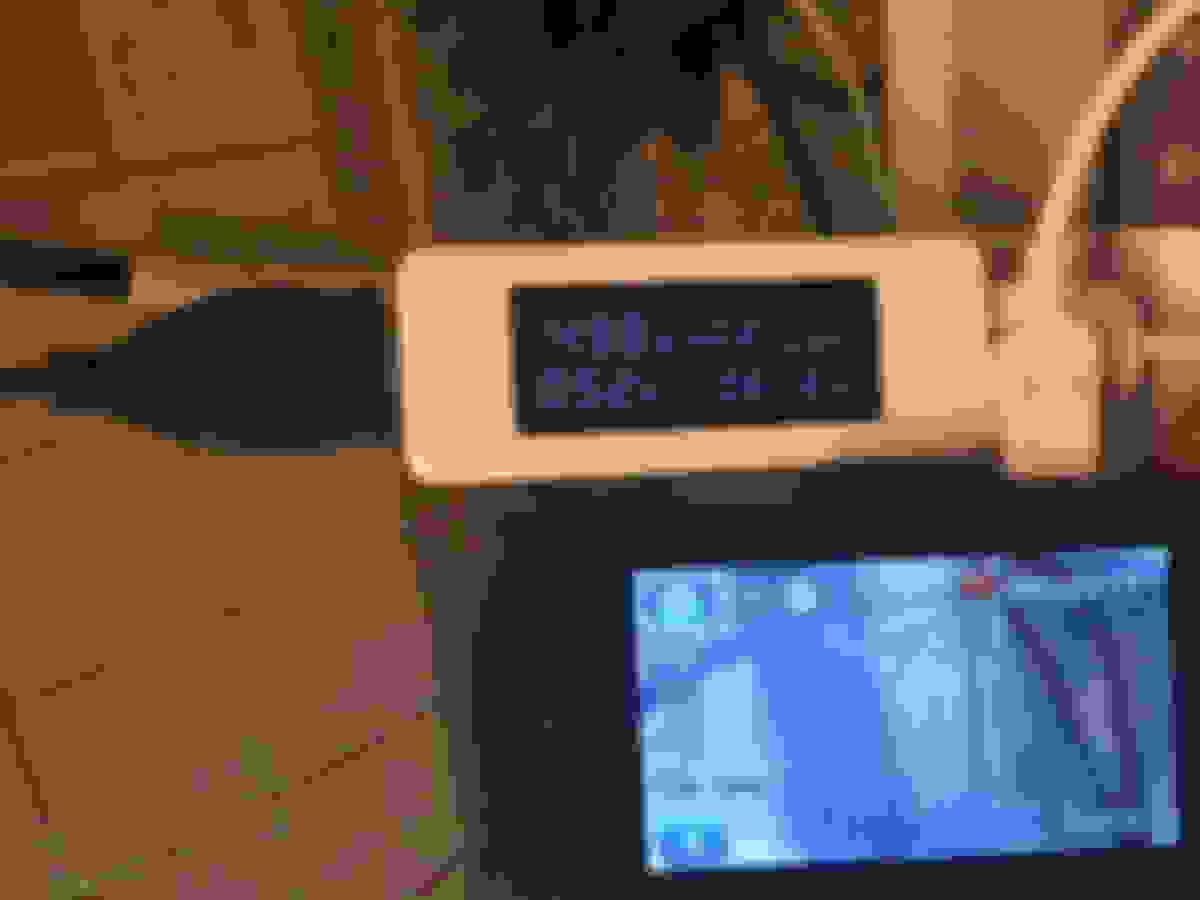
7) Attach your converter box. You can solder to wire or just bend. Do not forgot to do isolation.
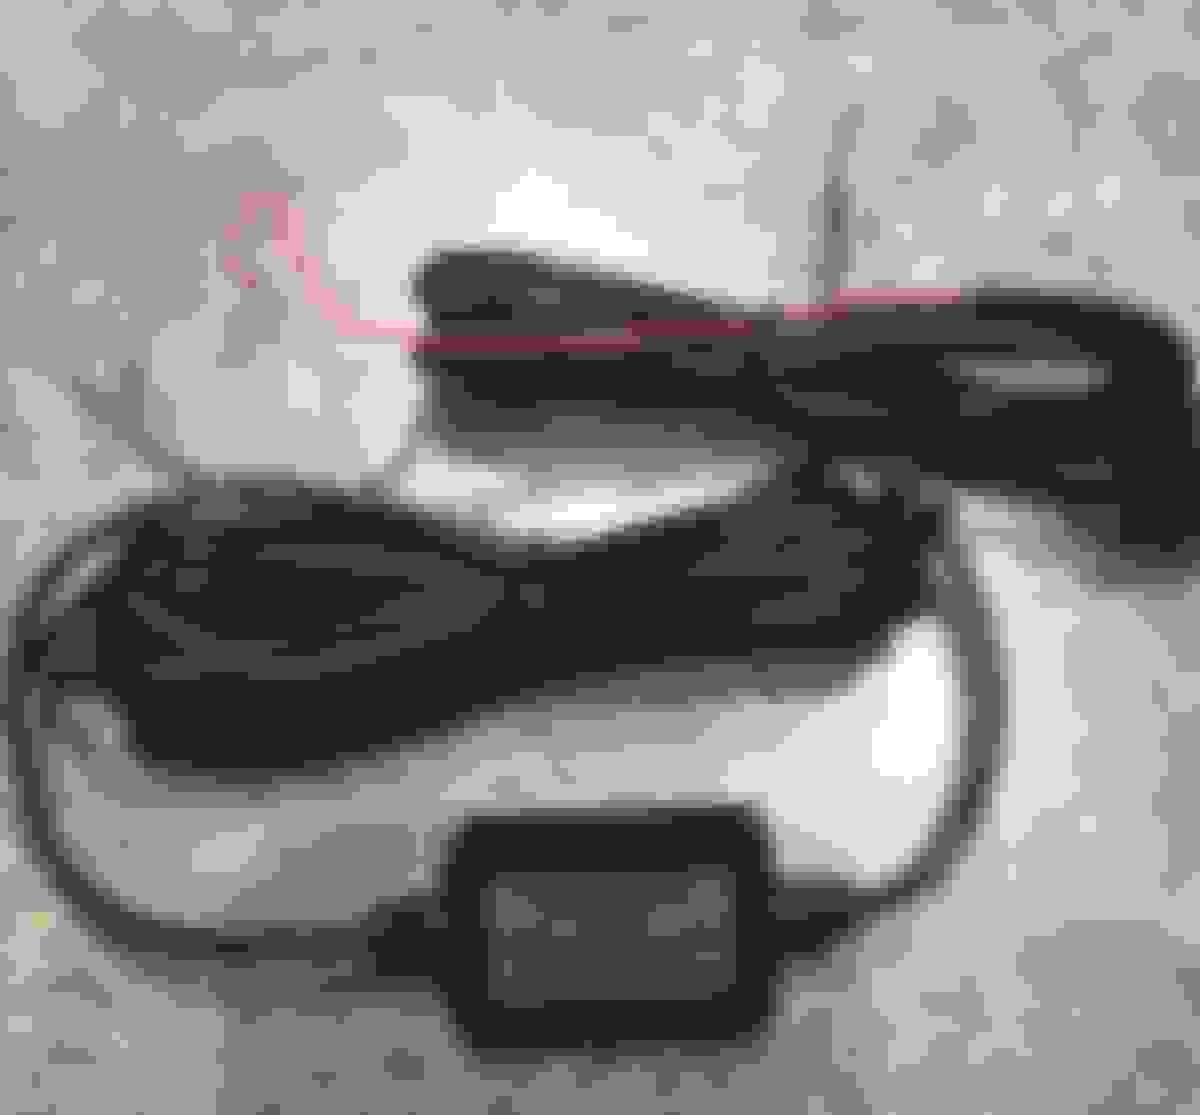
8) Put box inside - USB wire out and put cover back. Attach camera, GPS receiver. If camera mounted as shown on the picture - you cannot see it at all from driver seat.
Enjoy "wire free" installation
PS. Check how USB connector connected to camera before soldering box. Mine has USB L-connector that not fit well on camera mount. I used opposite side USB L-connector.
Ok then check out my hardwire install via mirrortap on our '17 Q7. No wires showing other than one coming straight from the base of the rearview mirror straight to the dashcam. Should be able to do the same on a B9 A4!
larryV, thanks for the link and instructions for your dash cam installation. A friend who has done this many times, and has all the tools already, and wasn't as terrified as me about cracking open my brand new car read your post, he told me that we should be able to do the same thing. So we used your post as a guide. The 2017 A4 is very similar. I mixed it up a bit because I wanted to stick with a 5V dash cam with which I was familiar, but in general the steps were the same. Some pics are below.
Inverter (can buy different mini/micro/right angle plugs):
HitCar DC 12V to 5V Power Inverter Mini / Micro USB DC 3.5 Hard Wired Converter Kit Car Charger Cable for GPS Tablet Phone PDA DVR Recorder (Mini USB Right Angle) https://www.amazon.com/gp/product/B0...?ie=UTF8&psc=1
larryV has very detailed instructions already so I'll just give some highlights.
Upon removal of the covers:
The spliced and soldered inverter and mirror tap:
Mirror tap into yellow and brown just like larryV's instructions:
The inverter nestled into an empty spot on the driver's side of the mirror assembly that almost seemed to be made for it:
I created a small notch in the hard rubber that creates a seal between the cover and the windshield, on the passenger side:
Everything buttoned back up:
Dash cam installed:
The dash cam has plenty of clearance to the mirror, doesn't interfere with my Covercraft UVS100 custom sunscreen, and I can reach all the buttons with no problems or hitting the mirror. It's also reasonably stealthy from the outside. In fact it's pretty hard to see (and photograph) due to the windshield reflections. Inside my garage with flash and the lights off, I got a picture. It almost looks like a camera that would be part of an OEM install for lane assist. It's easy enough to take down that I won't leave it in plain sight if I'm going to be parked somewhere for a while, but hidden enough that I'll leave it up for short stops.
So thank you larryV for the big hand with this. Thanks to the rest of the community too. I've been lurking for a while I was waiting the 2.5 months for my custom A4 Prestige to arrive, and I was able to learn much before taking delivery. My car arrived in early July and I couldn't be happier.
How are you routing the cable to a power source? What are you using as a power source (fuse, 12v cigarette port, USB)?
Hi Peter,
I just finished installing the Garmin35 DashCam in my new A8L. The cam is just to the right of the rear view mirror, and I took the power from the overhead center console. I used the accessory power lead going into the Home-link gate/garage buttons. My DashCam needs +5V so I also had to install a 12v-to-5v transformer between the tap and the DashCam. To Readers: do not attempt this yourself if you do not possess the knowledge,skills, and tools to do the job correctly. I am not liable if you damage your car.
Garmin DashCam powered from overhead console accessory lead (gate opener power wire) in 2016 A8L
The overhead comes down after removing this one screw. Be careful not to strain the wires so do not let it drop.
My gate opener component has three wires. The right-most black wire was my accessory+ power wire.
Do not drill a hole like this if you are not expert at drilling plastics or you will wreck your overhead console. Drilling a hole in the overhead console was done using a special drill bit made specifically for plastic materials, and past experience drilling into plastics.
 07-24-2016, 06:48 PM