Please help identifying oil leak
 01-12-2010, 04:52 AM
#21
AudiWorld Member

Join Date: Oct 2009
Location: Miami/FL
Posts: 181
Likes: 0
Received 0 Likes
on
0 Posts
Hey-If I may ask, where did you find this bit of info? What manual? I've got the Bentley and it covers a absolutely NOTHING on engine teardown other than timing belt replacement. I must say I was a bit dismayed at the lack of info on the mechanical end by Bentley for the A-6. The Bentley I had for my 100CS was far more in depth. By the way, I've done all the seals and adjuster gaskets and I've still got oil leaks on my 2001 A-6 Quattro w/2.8L 30-valve. This might be what I have to do next.
I believe this was made by Bentley also since much of the info are exaclty the same including the pictures. But, this DVD has some info not found on Bentley as well as Bentley has some info not found on the DVD.
I've got this copy on Ebay.
I have some bad oil leaks too. Same engine. So if you face the job and reseal your upper pan, please post the results as well as your experience.
 01-12-2010, 06:27 AM
#22
AudiWorld Member

Join Date: Nov 2004
Posts: 104
Likes: 0
Received 0 Likes
on
0 Posts
This is the official Audi documentation that dealers use. It is a software DVD. It is called Elsa Win.
I believe this was made by Bentley also since much of the info are exaclty the same including the pictures. But, this DVD has some info not found on Bentley as well as Bentley has some info not found on the DVD.
I've got this copy on Ebay.
I have some bad oil leaks too. Same engine. So if you face the job and reseal your upper pan, please post the results as well as your experience.
 01-12-2010, 07:00 AM
#24
AudiWorld Member
Join Date: Oct 2009
Location: Miami/FL
Posts: 181
Likes: 0
Received 0 Likes
on
0 Posts
04-26-2010, 02:34 PM
#25
AudiWorld Newcomer
Thread Starter

Join Date: Jan 2010
Posts: 6
Likes: 0
Received 0 Likes
on
0 Posts
I did the cam adjuster seals and cam seals without special tools.
I tried to buy the tools from VAG in Sweden but without success. Reason: not allowed to sell or rent VAG tools...
Anyway, here is a picture of the homemade cam adjuster compressor I made:
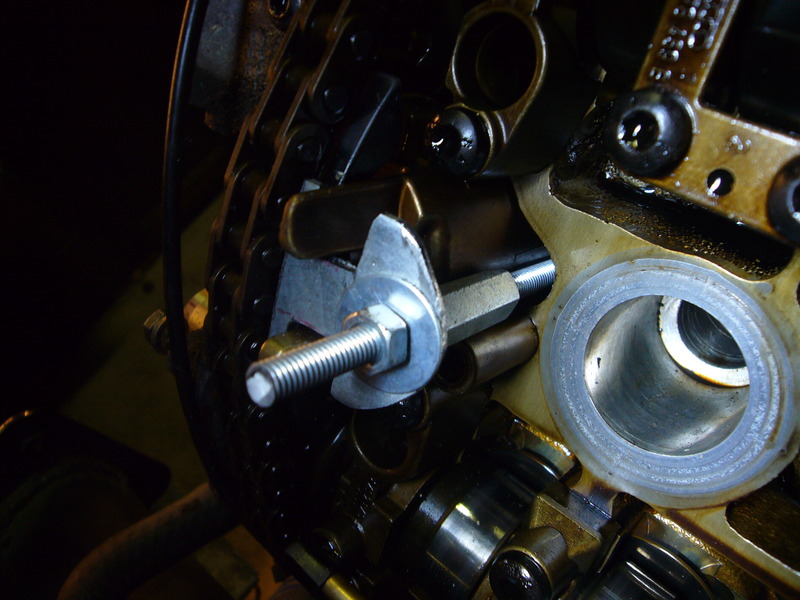
I compressed the adjuster by hand (fairly easy) and locked it in place with the tool.
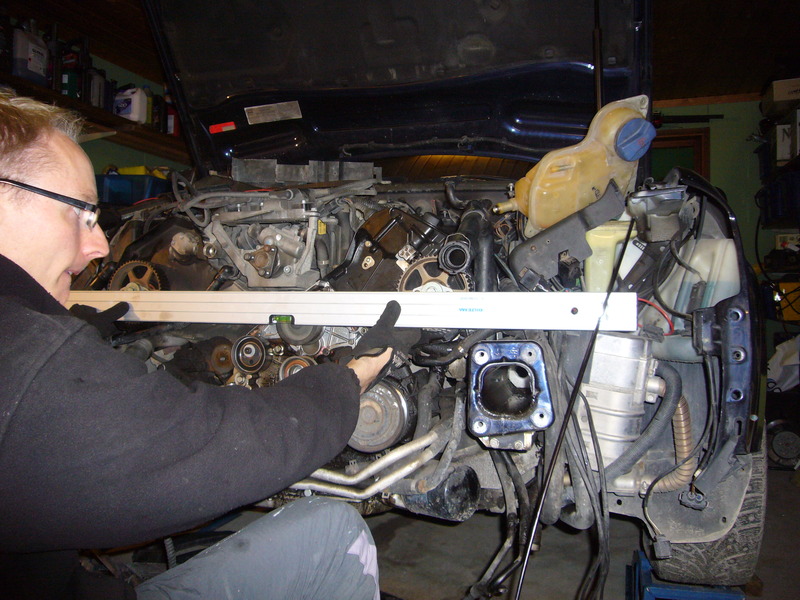
The harder part was to align the cams correctly without the special tool.
Aligning the cams
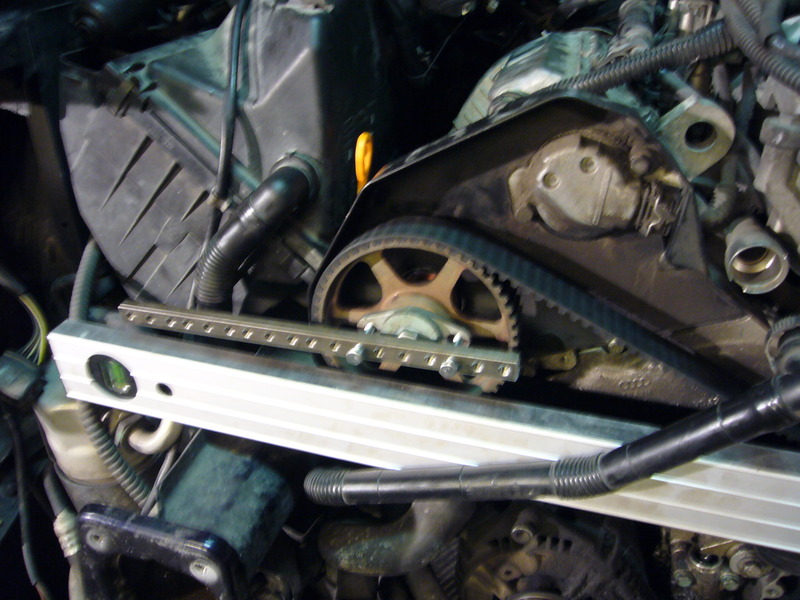
The crank must be in correct position. Install the right cam sprocket and set it in correct position using the bracket with the two holes. Then temporarly install the second sprocket but not too hard in "correct" position. Then put the timingbelt on. Turn the engine two turns to make sure the belt is in correct position (be careful here, if you are way off the valves will hit the pistons). Loose the nut holding the left sprocket a little and pull loose the sprocket. Now make marks in the middle of the brackets as in pic. Use a straight bar to align the cams. When aligning you only turn the right cam. The sprocket stays in position.
Aligning the cams before installing the timingbelt. I used the same method when aligning with the belt on:
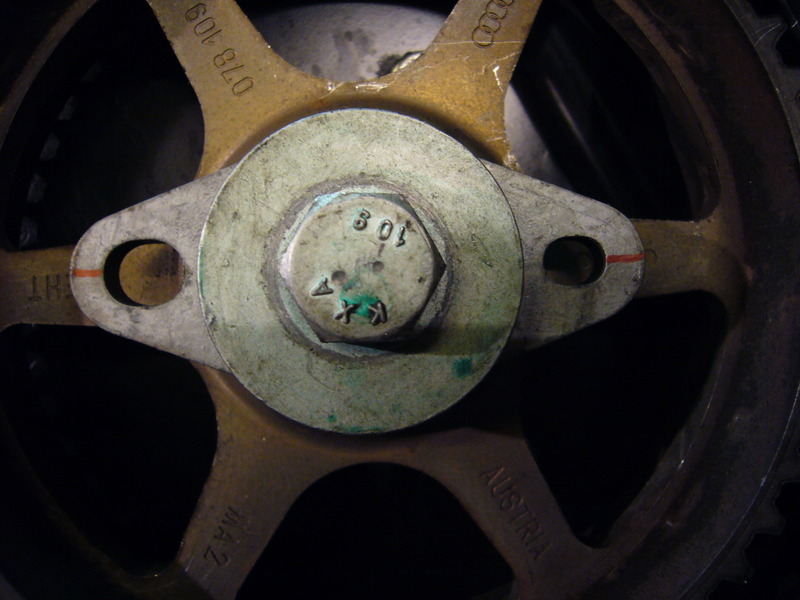
Marked the brackets in the middle to ease aligning:
Loose the sprocket to be able to turn only the cam:
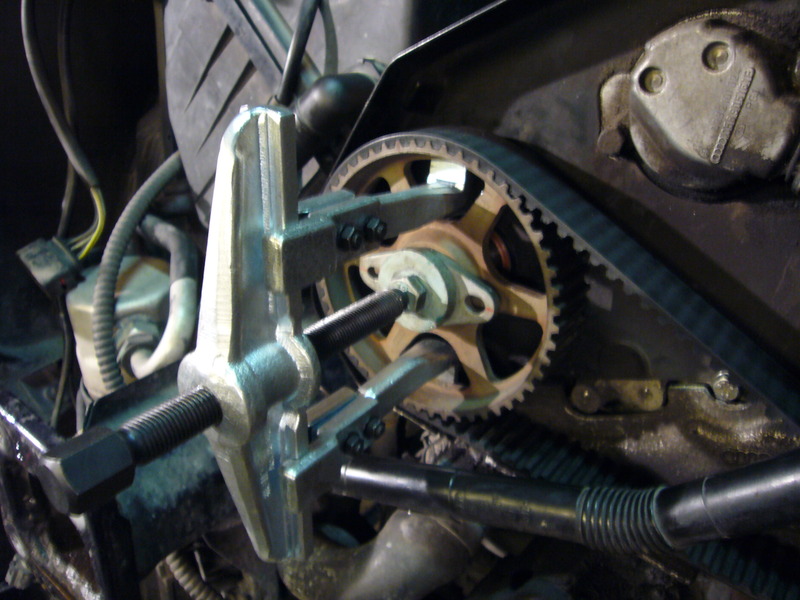
I used this tool to turn only the cam:
Note that this is how I did it. Might not be the correct method but the engine spins just fine. If someone notice some error in my method please correct!
I tried to buy the tools from VAG in Sweden but without success. Reason: not allowed to sell or rent VAG tools...
Anyway, here is a picture of the homemade cam adjuster compressor I made:
I compressed the adjuster by hand (fairly easy) and locked it in place with the tool.
The harder part was to align the cams correctly without the special tool.
Aligning the cams
The crank must be in correct position. Install the right cam sprocket and set it in correct position using the bracket with the two holes. Then temporarly install the second sprocket but not too hard in "correct" position. Then put the timingbelt on. Turn the engine two turns to make sure the belt is in correct position (be careful here, if you are way off the valves will hit the pistons). Loose the nut holding the left sprocket a little and pull loose the sprocket. Now make marks in the middle of the brackets as in pic. Use a straight bar to align the cams. When aligning you only turn the right cam. The sprocket stays in position.
Aligning the cams before installing the timingbelt. I used the same method when aligning with the belt on:
Marked the brackets in the middle to ease aligning:
Loose the sprocket to be able to turn only the cam:
I used this tool to turn only the cam:
Note that this is how I did it. Might not be the correct method but the engine spins just fine. If someone notice some error in my method please correct!
 04-26-2010, 02:46 PM
#27
AudiWorld Newcomer
Thread Starter
Join Date: Jan 2010
Posts: 6
Likes: 0
Received 0 Likes
on
0 Posts

Thread
Thread Starter
Forum
Replies
Last Post
ECS Tuning-Audi
A4 (B7 Platform) Discussion
0
09-01-2015 09:16 AM
ECS Tuning-Audi
Audi A5 / S5 / RS5 Coupe & Cabrio (B8)
0
09-01-2015 08:27 AM